


Sorry I haven't been around for a while but I've been busy trying to get all my Christmas cards made. I'm nearly done (only got about 10 left to go!!) and will post the finished cards on here after Christmas once I'm back from my three-week break over in Dublin with the in-laws.
There was also the small matter of the Sergeants' Mess Christmas Ball which was on Saturday (where we won a 22" LCD TV in the Christmas draw - not bad for a night's work!). I managed to get a beautiful dress (had to be floor-length). No doubt someone will post some photos on Facebook before long so I'll let you know if any surface!!!
Well, I'd better get back to my Christmas cards - we're going over to Dublin on Thursday so haven't got very long, especially as I'll have to do all the sorting out and the packing!!!
I've only got one more post before I go away (my Design Team entry for the Flutterby Crafts Monthly Blog Challenge), but I want to take the time now to say a big MERRY CHRISTMAS to everyone, but especially to those who have become good friends over the last few months.
Have a good New Year too - and remember, everything in moderation!!!
Tuesday 16 December 2008
Tuesday 9 December 2008
A birthday card for Alex (Eisbaerin)
Here is the birthday card that I made for Alex (Eisbaerin) for her birthday on Sunday. It sounds like she had a lovely day!!
I made the card to double as a wallet card as I wanted to reciprocate all the lovely images she has sent me over the past few months. I haven't made up for everything but I hope it goes someway to say thank you!!!
 The image is a cute little Docrafts stamp, which I coloured with Whispers Brushstroke markers and a green Impress re-inker.
The little tag was 3D'd to add dimension, and the mouse image was matted onto lime green card from the DCWV Brights cardstack.
The patterned papers are from the K&Co Amy Butler Belle paper pad, and a length of green organza ribbon was attached across the pieces of paper and a knot was added.
The sentiment was stamped using one of the circles from the HOTP Sentiments set and also matted onto lime green DCWV card, cut using the Fiskars Shapecutter and circles template. A small piece of ribbon was attached to it to make it look like it is hanging.
A lime green Papermania brad was attached through a pink paper flower from Crafty Cow and attached over the corner of the image.
I made the card to double as a wallet card as I wanted to reciprocate all the lovely images she has sent me over the past few months. I haven't made up for everything but I hope it goes someway to say thank you!!!
The image is a cute little Docrafts stamp, which I coloured with Whispers Brushstroke markers and a green Impress re-inker.The little tag was 3D'd to add dimension, and the mouse image was matted onto lime green card from the DCWV Brights cardstack.
The patterned papers are from the K&Co Amy Butler Belle paper pad, and a length of green organza ribbon was attached across the pieces of paper and a knot was added.
The sentiment was stamped using one of the circles from the HOTP Sentiments set and also matted onto lime green DCWV card, cut using the Fiskars Shapecutter and circles template. A small piece of ribbon was attached to it to make it look like it is hanging.
A lime green Papermania brad was attached through a pink paper flower from Crafty Cow and attached over the corner of the image.
A couple of Penny Black Christmas Cards
I'm starting to get very worried now that I'm not going to get my Christmas cards finished in time to post them!! I've got about 35 still to make. I managed to miss the last posting date to Australia, but hopefully I'll meet the US/Canada one on Wednesday!
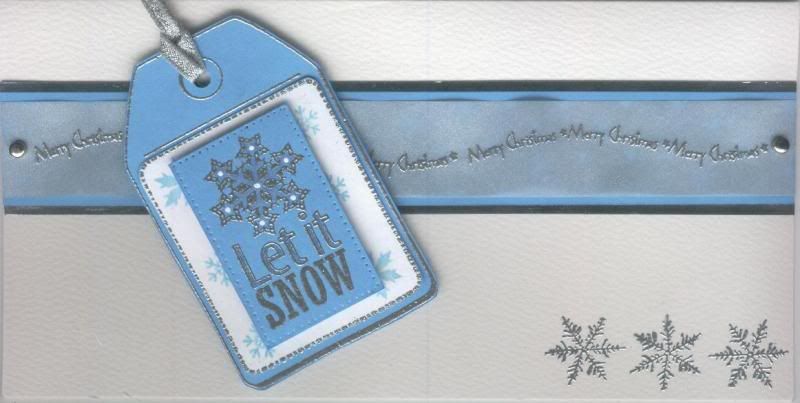
I managed to get another couple of cards made today, using a couple of Penny Black images that I received in an image swap from Judith B over on the docrafts forum.
 The first is using the ice skating Hedgie from the Penny Black Christmas Critters set. The image was watercoloured using Whispers Brushstroke markers and the hat highlighted with Anita's Metallic White 3D Dimensional paint.
The image was then placed beneath a slide mount covered with patterned paper from the HOTP Christmas Creative pack, as was the mini tag.
The greeting was taken from the HOTP Christmas Motifs stamp set, stamped using Versafine Onyx Black ink and cut out and matted onto the tag.
Red patterned paper from the HOTP Christmas Creative pack was matted onto gold mirror card as was a matching piece of green paper from the paper pack.
Red embroidery thread was threaded through the tag and attached in the corner of the card.
The second is using another Penny Black image from the Christmas Critter set, this time the Carol Singing Mice.
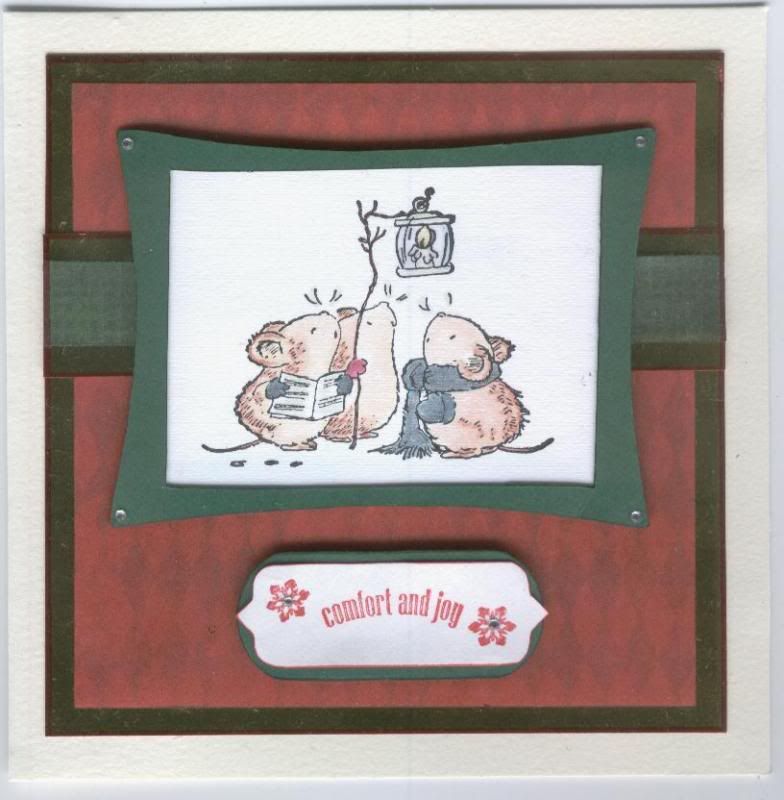 The image was watercoloured using Whispers Brushstroke markers and highlighted with clear Sakura Glaze pen on the lantern and clear Sakura Stardust pen on the gloves and scarf.
A frame was created from dark green card using the Fiskars Shapecutter and the Frames#1 template.
The patterned papers are from the HOTP Christmas Creative pack, and matted onto gold mirror card.
The greeting panel was cut out using the HOTP Labels template, and stamped using Brilliance Rocket Red ink and a greeting stamp from the Dovecraft Studio G Snow Phrases mini stamp set. The snowflakes were taken from the HOTP Christmas Motifs set. The greeting panel was then matted onto a shape cut out using the HOTP Tags template.
Small clear faux gems were adhered to the corners of the frame and to the centres of the snowflakes.
I managed to get another couple of cards made today, using a couple of Penny Black images that I received in an image swap from Judith B over on the docrafts forum.
The first is using the ice skating Hedgie from the Penny Black Christmas Critters set. The image was watercoloured using Whispers Brushstroke markers and the hat highlighted with Anita's Metallic White 3D Dimensional paint.The image was then placed beneath a slide mount covered with patterned paper from the HOTP Christmas Creative pack, as was the mini tag.
The greeting was taken from the HOTP Christmas Motifs stamp set, stamped using Versafine Onyx Black ink and cut out and matted onto the tag.
Red patterned paper from the HOTP Christmas Creative pack was matted onto gold mirror card as was a matching piece of green paper from the paper pack.
Red embroidery thread was threaded through the tag and attached in the corner of the card.
The second is using another Penny Black image from the Christmas Critter set, this time the Carol Singing Mice.
The image was watercoloured using Whispers Brushstroke markers and highlighted with clear Sakura Glaze pen on the lantern and clear Sakura Stardust pen on the gloves and scarf.A frame was created from dark green card using the Fiskars Shapecutter and the Frames#1 template.
The patterned papers are from the HOTP Christmas Creative pack, and matted onto gold mirror card.
The greeting panel was cut out using the HOTP Labels template, and stamped using Brilliance Rocket Red ink and a greeting stamp from the Dovecraft Studio G Snow Phrases mini stamp set. The snowflakes were taken from the HOTP Christmas Motifs set. The greeting panel was then matted onto a shape cut out using the HOTP Tags template.
Small clear faux gems were adhered to the corners of the frame and to the centres of the snowflakes.
Friday 5 December 2008
I've been given an award!!!
I received this award from the lovely Babz back in October and completely forgot all about it.
 I only realized I'd forgotten when I saw that I was up to 100 posts, but only 99 were showing, so technically this is my 100th post!!!
Poor Babz is suffering quite a bit of upheaval at the moment - not least because she's moving house - and country!! She's had to pack up all her crafting stash (I know what that's like, I had to do it myself last year!) and weirdly enough the removals people came and packed our house up on the 13th December just like Babz - I know this because I was unloading the van on the 14th - my wedding anniversary!!!!
So, pop over to Babz's lovely blog and leave her some messages of moral support, if, for no other reason than she can't stroke her lovely papers at the moment!!!
The rules of this award state that I can pass it on to six of my crafting friends. This is going to be hard to narrow it down to just six!!!
But, the six I have chosen are:
Tara
Alex
Katy
Julie
Tracy
Sarah
I'm sure they've probably already been given this award, what with me being so late in the day passing it on (let's face it, it's only just still Autumn!!), but I wanted them to know that I consider them good friends (some only 'virtual', but friends nonetheless!!)
I only realized I'd forgotten when I saw that I was up to 100 posts, but only 99 were showing, so technically this is my 100th post!!!Poor Babz is suffering quite a bit of upheaval at the moment - not least because she's moving house - and country!! She's had to pack up all her crafting stash (I know what that's like, I had to do it myself last year!) and weirdly enough the removals people came and packed our house up on the 13th December just like Babz - I know this because I was unloading the van on the 14th - my wedding anniversary!!!!
So, pop over to Babz's lovely blog and leave her some messages of moral support, if, for no other reason than she can't stroke her lovely papers at the moment!!!
The rules of this award state that I can pass it on to six of my crafting friends. This is going to be hard to narrow it down to just six!!!
But, the six I have chosen are:
Tara
Alex
Katy
Julie
Tracy
Sarah
I'm sure they've probably already been given this award, what with me being so late in the day passing it on (let's face it, it's only just still Autumn!!), but I wanted them to know that I consider them good friends (some only 'virtual', but friends nonetheless!!)
My 100th post!!! Another Christmas card
This is my 100th post - I can't believe it!!
I've made another Christmas card in my mammoth task - hopefully it's not an impossible task to make the last 35 cards before they have to be posted!!
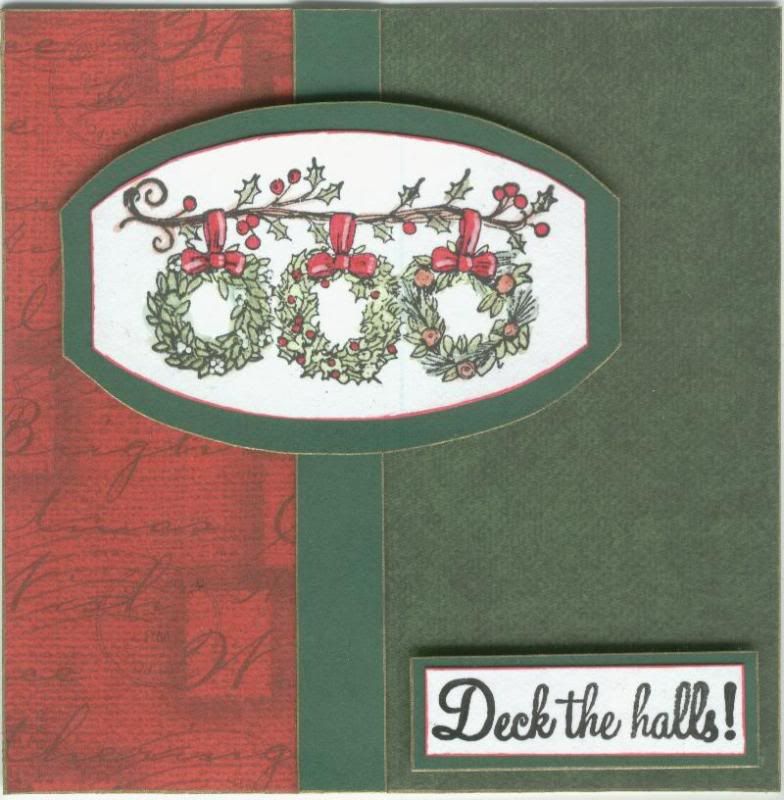 The focal image of this card is the Hampton Arts 'Wreaths' image, which was very kindly supplied by Loretta in a forum image swap.
The image was watercoloured using Whispers Brushstroke markers and highlighted with white Sakura Souffle pen. It was cut into a tag shape using the HOTP Tags#2 template and matted onto dark green card.
The greeting was taken from the HOTP Christmas Sentiments stamp set and stamped using Brilliance Graphite Black ink. This was also matted onto dark green card and both panels were edged with gold paint pen.
The patterned papers are from the HOTP Christmas Creative pack.
So, here's to another 100+ posts!!!!
I've made another Christmas card in my mammoth task - hopefully it's not an impossible task to make the last 35 cards before they have to be posted!!
The focal image of this card is the Hampton Arts 'Wreaths' image, which was very kindly supplied by Loretta in a forum image swap.The image was watercoloured using Whispers Brushstroke markers and highlighted with white Sakura Souffle pen. It was cut into a tag shape using the HOTP Tags#2 template and matted onto dark green card.
The greeting was taken from the HOTP Christmas Sentiments stamp set and stamped using Brilliance Graphite Black ink. This was also matted onto dark green card and both panels were edged with gold paint pen.
The patterned papers are from the HOTP Christmas Creative pack.
So, here's to another 100+ posts!!!!
Thursday 4 December 2008
Four New Christmas Card Designs
I've been away for a couple of days but I have tried to be busy (despite being sidetracked by a bit of shopping - I needed a dress for the Mess Christmas Ball, some rugby, some poker and a bit more rugby!!! - I won the poker by the way - amazingly, cos I still don't know how to play properly).
Anyway, I've managed to knock out 15 cards, so I'm getting there slowly but surely!!!

The first design is the Pink and Green Tall Stylized Christmas Tree.
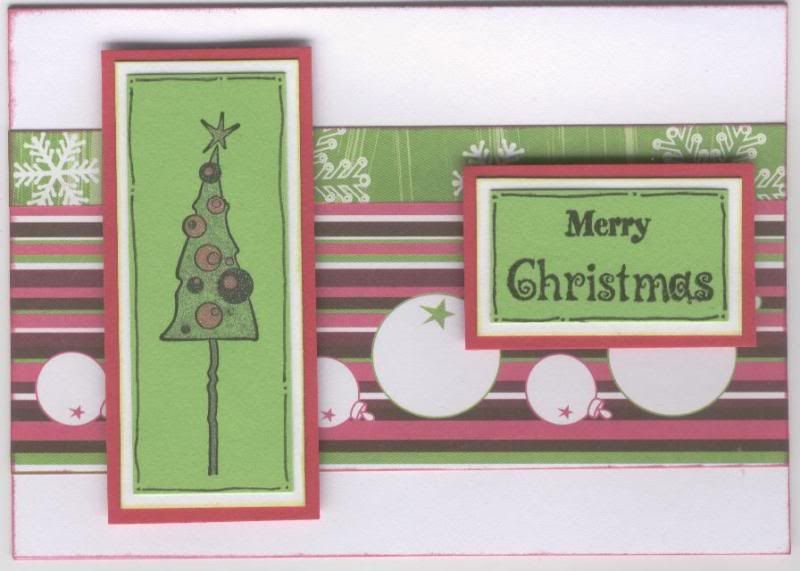
The Christmas Tree image was stamped and coloured using Sakura Stardust pens.
The sentiment was stamped using stamps from both the HOTP Christmas Sentiments and Motifs stamp sets.
Faux stitching was added around the edges of both panels too, and both panels were matted onto white and cerise pink card.
The patterned papers are from the Anita's Naughty and Nice Paper pad.
The second design was the Pink and Green Stylized Christmas Tree.
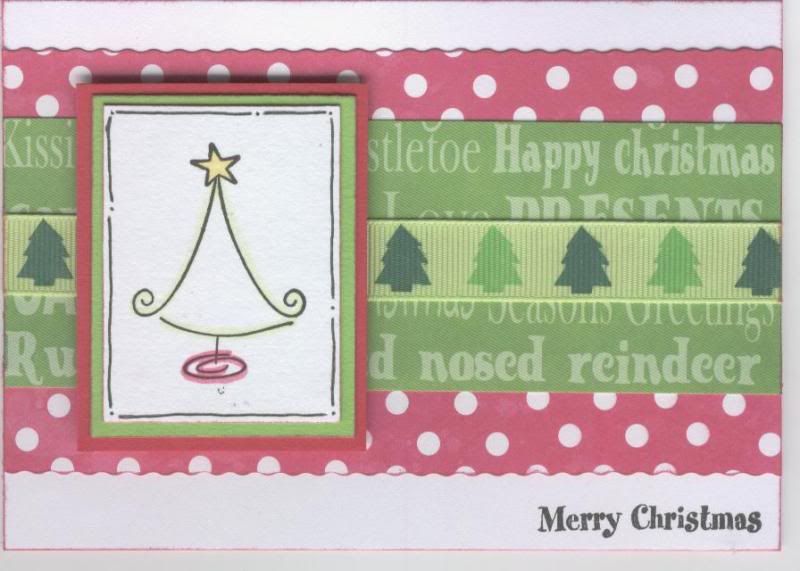 The image, from a Dovecraft Studio G mini stamp set, was stamped and colour was added using the Whispers Brushstroke markers.
Faux stitching was added around the edges of the panel and this was then matted on to lime green and cerise pink cardstock.
The patterned papers, from the Anita's Naughty and Nice paper pad, were layered and a strip of Dovecraft printed grosgrain ribbon attached over the top.
The sentiment was taken from the HOTP Christmas Motifs stamp set.
 The Papermania Ornate Christmas Tree stamp was stamped and silver embossed four times onto cerise pink, lime green and white cardstock.
Anyway, I've managed to knock out 15 cards, so I'm getting there slowly but surely!!!
The first design is the Pink and Green Tall Stylized Christmas Tree.
The Christmas Tree image was stamped and coloured using Sakura Stardust pens.
The sentiment was stamped using stamps from both the HOTP Christmas Sentiments and Motifs stamp sets.
Faux stitching was added around the edges of both panels too, and both panels were matted onto white and cerise pink card.
The patterned papers are from the Anita's Naughty and Nice Paper pad.
The second design was the Pink and Green Stylized Christmas Tree.
The image, from a Dovecraft Studio G mini stamp set, was stamped and colour was added using the Whispers Brushstroke markers.Faux stitching was added around the edges of the panel and this was then matted on to lime green and cerise pink cardstock.
The patterned papers, from the Anita's Naughty and Nice paper pad, were layered and a strip of Dovecraft printed grosgrain ribbon attached over the top.
The sentiment was taken from the HOTP Christmas Motifs stamp set.
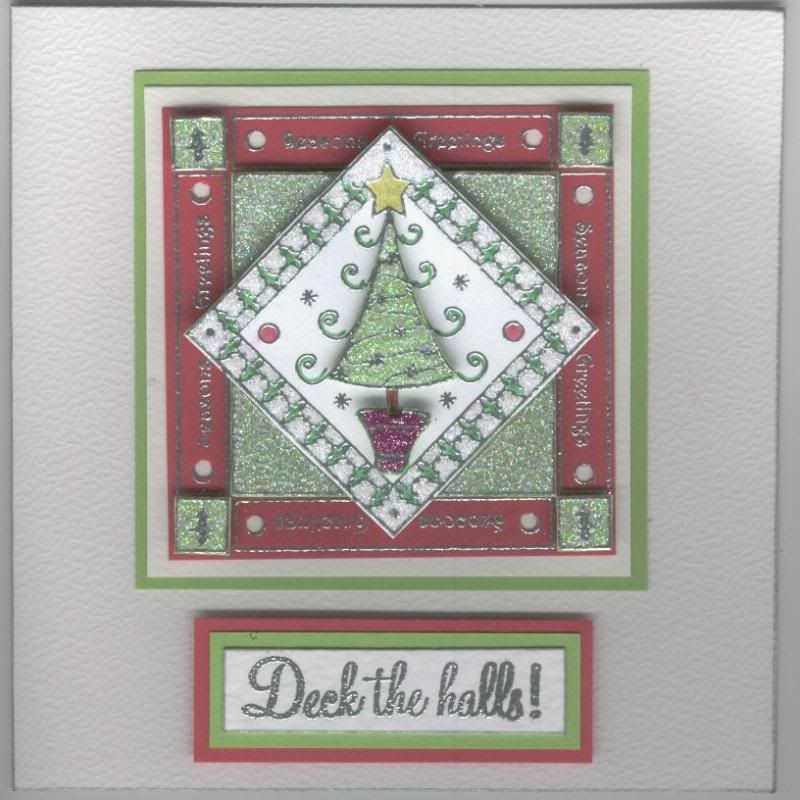
The third card design is the Glittered Pink and Green Ornate Christmas Tree.
The Papermania Ornate Christmas Tree stamp was stamped and silver embossed four times onto cerise pink, lime green and white cardstock.
The different layers were cut out and glittered using DecoArt Crystal Glamourdust and Cerise Pink glitter. The white layer was also coloured using Sakura Stardust pens.
The different pieces were layered up and matted onto white and lime green cardstock.
The greeting, from the HOTP Christmas Sentiments stamp set, was silver embossed, cut out and edged with silver paint pen and matted onto lime green and cerise pink cardstock.
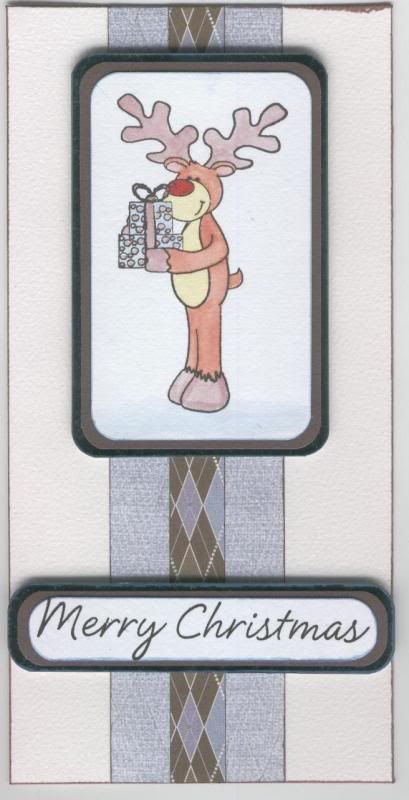
The last card I made is the Blue and Brown Rudolph with Presents card.
The Anita's Rudolph with Presents image was stamped and watercoloured using Whispers Brushstroke markers. His nose was coloured using a red Sakura Stardust pen.
This was matted onto chocolate brown card and light blue mirror card, as was the sentiment which is from the See D's Christmas Messages stamp set.
The patterned papers were taken from the HOTP Ultimate Christmas Creative Pack, each piece highlighted with clear Sakura Stardust pen.
Oh yes, to get back to the poker......
Last night, seven squaddies (only one of whom didn't know how to play poker) and myself sat down at the table and (despite a couple of protestations of collusion!) there was only myself and DH left at the table with chips so we shared the pot - at least that's what I told DH we'd do with the winnings!!! Cost us £5 each for us to play, and came home with £40!!! Not bad for a night's work!!
I've been given three awards!!!
I've been given three awards.
The first is the Kreativ Blogger award that Jackie gave to me. So a big thank you to Jackie. Much appreciated!!
The first is the Kreativ Blogger award that Jackie gave to me. So a big thank you to Jackie. Much appreciated!!
 The rules for this award are as follows:
The winner may put the logo on their blog.
You must add a link to the person who sent you the award.
You must nominate 5 blogs, adding links to their blogs.
You must leave a message for your nominees on their blogs to let them know.
So, my 5 nominees are:
Caroline
CarlyAnn
Debby
Sarah
Natalie
I have also been awarded the I Love Your Blog Award by Alex. Thank you very much Alex - this is high praise from you!! Apparently I have to pass this on to 7 people.
So, I am passing this on to:
Jo
Kim
Sarita
Lorraine
Becky
Taylor
Leslie
I have also been given the Proximity Award by Lisa and Katy. So a double thank you to you both. The award means that this blog invests and believes in PROXIMITY - nearness in space, time and relationships! These blogs are exceedingly charming. These kind bloggers aim to find and be friends. They are not interested in prizes or self-aggrandizement. Our hope is that when the ribbons of these prizes are cut, even more friendships are propagated. Please give more attention to these writers! Deliver this award to 8 bloggers who must choose 8 more and include this cleverly-written text into the body of their award.
So, the eight people I shall be giving this to are:
Tara
Alex
Julie
Katy
Clare
Jo
Janet
Tracy
Well, better let these people know that they've got an award!
Might take me some time!!!
Monday 1 December 2008
Pink and Purple Tilda with Sledge
 Tilda was stamped and watercoloured with Whispers Brushstroke markers, cut out (not square though due to the way I had stamped them out!), matted onto black card and highlighted with Craft Planet Irridescent Sparkle Glitter Glue and Anita's Metallic White 3D dimensional paint.
Two co-ordinating papers from the DCWV Rose Tinted Christmas Multi Stack were cut to size and were attached to the card blank.
A file tab was cut from matching violet card to the card blank using a Sizzlet die, and the sentiment stamped using a stamp from the HOTP Christmas Motifs set and Versafine Onyx Black Archival Pigment ink. This was attached behind the Tilda image and attached to the card front.
A scroll was stamped over the snowflake paper using a stamp from the HOTP Christmas scrolls stamp set and highlighted with Anita's Metallic White 3D dimensional paint.
I've been tagged - again!
 I have been tagged by the very talented Caroline. I am honoured as I love her cards - in fact, so much so that I've copied and pasted a few of her designs onto a sheet as inspiration for my Christmas cards this year!!!
I have to share 7 random or weird facts about myself - then tag 7 people & let them know they have been tagged!
So, seven new weird and wonderful facts about myself........
1. I hate bananas - hate the smell, hate the texture and the taste - yet, I seem to be able to cope with artificial banana flavourings - and I love Pisang Ambon!!!
2. I make a mean curry - it's so good, that squaddies want to eat it!! (Not just random ones, DH is in the army!!!)
3. I worked as a teaching assistant in a German Hauptschule (like a comprehensive) teaching English for 10 months as part of my German Degree course. It confirmed my thoughts that I didn't want to be a teacher!!! It was very hard work, with a classroom of 30% Turkish kids who didn't even speak German, let alone English!! (Teaching the 6-8 year olds was good fun though, especially playing Bingo!)
4. My favourite cocktail is Pina Colada - although I'm up for trying new ones!!!
5. I'm a sports addict - but only as a spectator! I love watching football, rugby, tennis, ice skating, athletics, cricket - but have only watched rugby live. I'd love to go and watch my beloved Spurs play at White Hart Lane (especially if it was the day we beat Arsenal!!)
6. I worked in a jewellery shop between finishing uni and getting married, so I'm quite good at identifying semi-precious stones (we didn't do gemstones!).
7. I collect Denby Greenwich - but hardly ever use it!! It's for special occasions, don't you know!
So, there are my seven facts and here are the seven people I'm tagging:
Friday 28 November 2008
Blue and Brown Tilda with Sledge
I decided, as I liked the last Tilda with Sledge card so much, that I'd have a go at making the same card (or at least very similar) but in a different colourway.
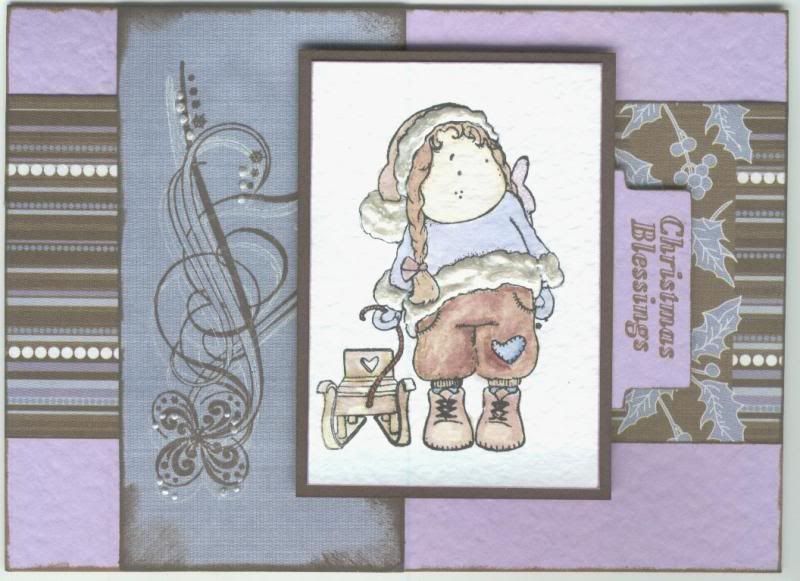 I love these papers from the HOTP Ultimate Christmas Cardmakers pack. The colours are beautifully matched and the designs are wonderful to work with.
Tilda was stamped and watercoloured with Whispers Brushstroke markers, matted onto chocolate brown card and highlighted with Craft Planet Irridescent Sparkle Glitter Glue and Anita's Metallic White 3D dimensional paint.
Two co-ordinating papers from the HOTP Ultimate Christmas Cardmakers pack were cut to size and the blue piece was stamped using one of the scroll stamps from the HOTP Christmas Scrolls stamp set. This was done using the 3D stamping technique. The inks used for this were Brilliance Moonlight White pigment ink and ColorBox Chestnut Roan Fluid Chalk ink.
The two panels were attached to the card blank. A file tab was cut from matching lilac hammer card to the card blank using a Sizzlet die, and the sentiment stamped using two stamps from the HOTP Christmas Motifs set and ColorBox Chestnut Roan Fluid Chalk. This was attached behind the Tilda image and attached to the card front.
The scroll stamped image was then highlighted with Anita's Metallic White 3D dimensional paint.
I decided to leave off the snowflakes this time, but the rest is more or less the same as the Pink and Turquoise version.
I love these papers from the HOTP Ultimate Christmas Cardmakers pack. The colours are beautifully matched and the designs are wonderful to work with.Tilda was stamped and watercoloured with Whispers Brushstroke markers, matted onto chocolate brown card and highlighted with Craft Planet Irridescent Sparkle Glitter Glue and Anita's Metallic White 3D dimensional paint.
Two co-ordinating papers from the HOTP Ultimate Christmas Cardmakers pack were cut to size and the blue piece was stamped using one of the scroll stamps from the HOTP Christmas Scrolls stamp set. This was done using the 3D stamping technique. The inks used for this were Brilliance Moonlight White pigment ink and ColorBox Chestnut Roan Fluid Chalk ink.
The two panels were attached to the card blank. A file tab was cut from matching lilac hammer card to the card blank using a Sizzlet die, and the sentiment stamped using two stamps from the HOTP Christmas Motifs set and ColorBox Chestnut Roan Fluid Chalk. This was attached behind the Tilda image and attached to the card front.
The scroll stamped image was then highlighted with Anita's Metallic White 3D dimensional paint.
I decided to leave off the snowflakes this time, but the rest is more or less the same as the Pink and Turquoise version.
Thursday 27 November 2008
Pink and Turquoise Tilda with Sledge
I'm really pleased with this one, even if I do say so myself!!
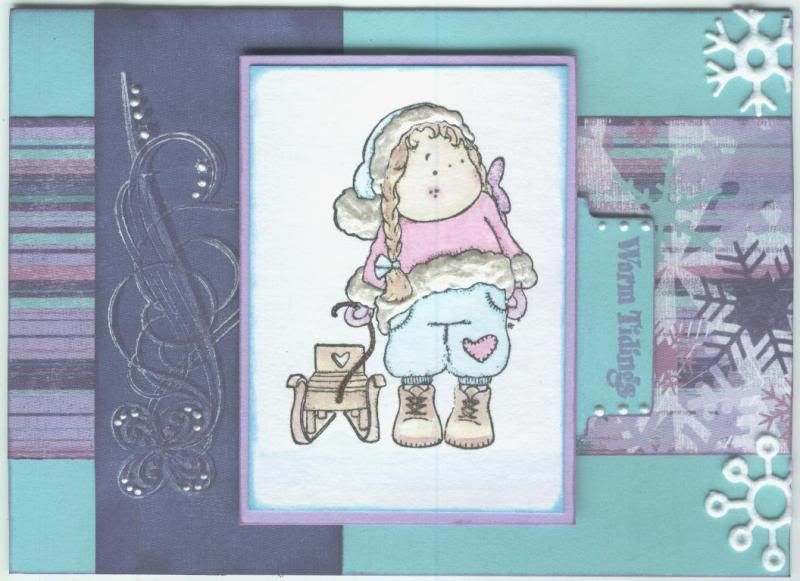 Tilda was stamped and watercoloured with Whispers Brushstroke markers, matted onto lilac card and highlighted with Craft Planet Lavender Glitter Glue (more on that later!) and Anita's Metallic White 3D dimensional paint.
Two co-ordinating papers from the HOTP Ultimate Christmas Cardmakers pack were cut to size and the blue piece was stamped using one of the scroll stamps from the HOTP Christmas Scrolls stamp set. This was done using the 3D stamping technique that I only learnt yesterday thanks to the Splitcoaststampers Weekly Newsletter that you can sign up for here. The inks used for this were Brilliance Moonlight White pigment ink and ColorBox Wisteria Fluid Chalk ink. The two panels were attached to the card blank.
A file tab was cut from matching turquoise card to the card blank using a Sizzlet die, and the sentiment stamped using a stamp from the HOTP Christmas Motifs set and ColorBox Wisteria Fluid Chalk. This was attached behind the Tilda image and attached to the card front.
Snowflakes were cut from the Papermania White Snowflake felt ribbon and attached in the corners.
The scroll stamped image and file tab were then highlighted with Anita's Metallic White 3D dimensional paint.
Now, as I mentioned earlier, Tilda's wings were highlighted with Craft Planet Lavender glitter glue. May i make a suggestion - don't try and get the glitter glue down to the nozzle if it's been stood on it's bottom by squeezing it with the lid still on. I ended up with a palm full of glitter glue and a bottle split from top to bottom!!! You've been warned!!!
Tilda was stamped and watercoloured with Whispers Brushstroke markers, matted onto lilac card and highlighted with Craft Planet Lavender Glitter Glue (more on that later!) and Anita's Metallic White 3D dimensional paint.Two co-ordinating papers from the HOTP Ultimate Christmas Cardmakers pack were cut to size and the blue piece was stamped using one of the scroll stamps from the HOTP Christmas Scrolls stamp set. This was done using the 3D stamping technique that I only learnt yesterday thanks to the Splitcoaststampers Weekly Newsletter that you can sign up for here. The inks used for this were Brilliance Moonlight White pigment ink and ColorBox Wisteria Fluid Chalk ink. The two panels were attached to the card blank.
A file tab was cut from matching turquoise card to the card blank using a Sizzlet die, and the sentiment stamped using a stamp from the HOTP Christmas Motifs set and ColorBox Wisteria Fluid Chalk. This was attached behind the Tilda image and attached to the card front.
Snowflakes were cut from the Papermania White Snowflake felt ribbon and attached in the corners.
The scroll stamped image and file tab were then highlighted with Anita's Metallic White 3D dimensional paint.
Now, as I mentioned earlier, Tilda's wings were highlighted with Craft Planet Lavender glitter glue. May i make a suggestion - don't try and get the glitter glue down to the nozzle if it's been stood on it's bottom by squeezing it with the lid still on. I ended up with a palm full of glitter glue and a bottle split from top to bottom!!! You've been warned!!!
Wednesday 26 November 2008
Pink and Purple Polar Bear
Got a few more Christmas cards made last night and here is the result of my hard work!!!
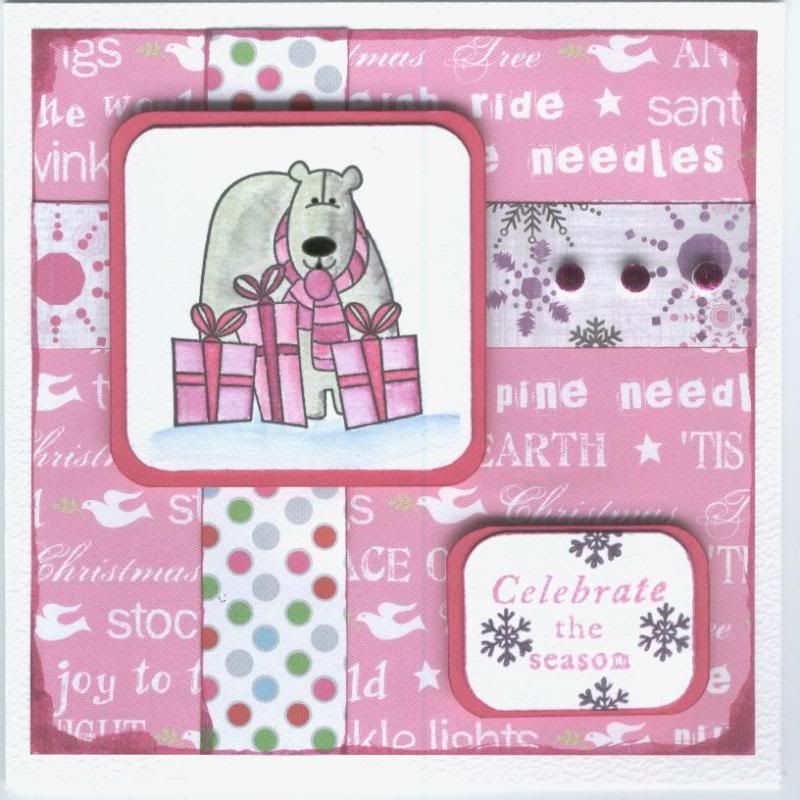 The Polar Bear image, from the See D's Christmas Fun stamp set, was stamped using Versafine Onyx Black ink and watercoloured using Whispers Brushstroke markers. A wash of pink Sakura Stardust pen was added to the ribbons on the presents and the polar bear's nose was coloured using a black Sakura Glaze pen.
The corners were rounded and the image matted onto a piece of pink card.
The patterned papers are from the DCWV Rose Tinted Christmas stack. The edges were coloured and the strips attached across the square of text paper.
The sentiment was taken from the HOTP Christmas Sentiments stamp set and stamped sing Pearlescent Orchid Brilliance ink. Mini Snowflakes from the HOTP Christmas Motifs stamp set were added around the sentiment using Versafine Purple ink.
Small foam dots were added to the paper strip and bright pink transfer foil was added to the adhesive.
The Polar Bear image, from the See D's Christmas Fun stamp set, was stamped using Versafine Onyx Black ink and watercoloured using Whispers Brushstroke markers. A wash of pink Sakura Stardust pen was added to the ribbons on the presents and the polar bear's nose was coloured using a black Sakura Glaze pen.The corners were rounded and the image matted onto a piece of pink card.
The patterned papers are from the DCWV Rose Tinted Christmas stack. The edges were coloured and the strips attached across the square of text paper.
The sentiment was taken from the HOTP Christmas Sentiments stamp set and stamped sing Pearlescent Orchid Brilliance ink. Mini Snowflakes from the HOTP Christmas Motifs stamp set were added around the sentiment using Versafine Purple ink.
Small foam dots were added to the paper strip and bright pink transfer foil was added to the adhesive.
Tuesday 25 November 2008
Red and Green Robins
I'm on a roll now - this is design number five, and that's 17 cards made. Only about 67 to go now!!!

This design is obviously loosely based on the last one, as the image is a similar size.
The three mini robin stamps, from the See Ds Christmas Fun stamps set, were stamped and watercoloured using the Whispers Brushstroke markers and the present was coloured using the light green Sakura Stardust pen.
The little hats and the snow were highlighted with the Papermania Glitter Flock.
The sentiment, from the See D's Christmas Messages stamp set, was stamped using Spanish Moss Versafine.
The two panels were matted onto DCWV red textured cardstock.
The patterned papers were taken from the HOTP Ultimate Christmas Cardmakers Creative pack and then matted onto red paper.
I can't decide if it needs a little something extra though - maybe spme faux gems or something. Will have to have another look at it. Let me know what you think.
Kerry Jo Balloon Girl Wallet Card
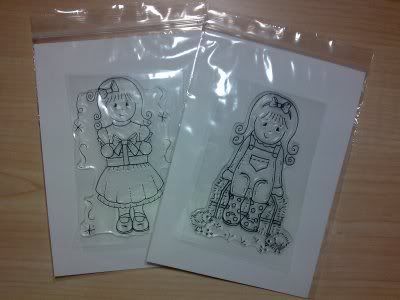
I just wanted to show you all the wallet card that I made for Annette (Sandra) over on the docrafts cardmaking forum for the die cut swap that was organized on there. I know that she has received it now so it's safe to upload the images to my blog.
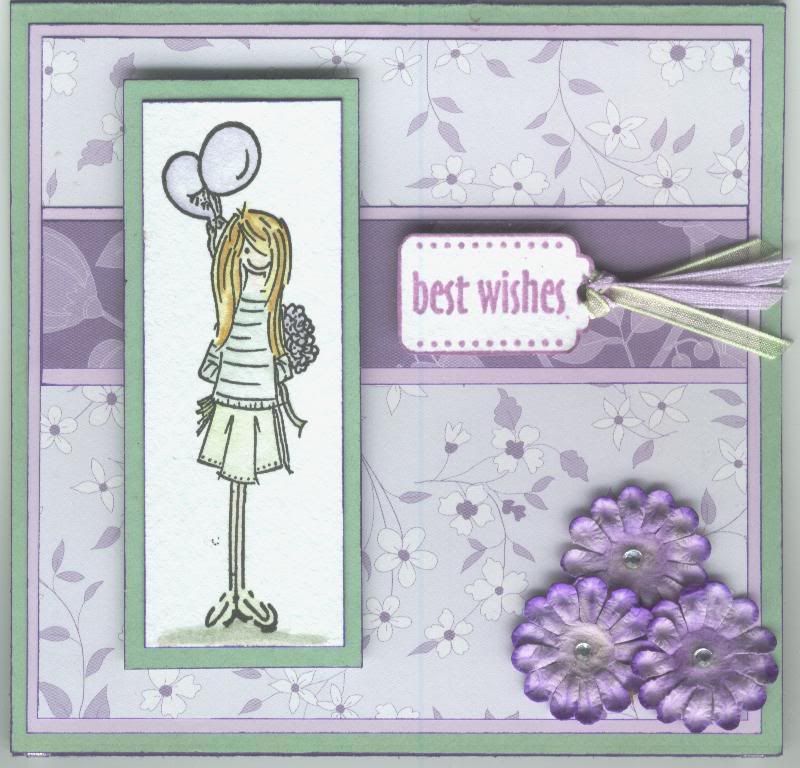
The Kerry Jo Balloon Girl (available from the Debbi Moore website) was watercoloured using the Whispers Brushstroke markers, and mounted onto green card.
The patterned papers are from the DCWV Floral Prints paper stack. These were matted onto lilac paper.
The sentiment tag is taken from the Stamps Away Everyday Tag-Its set (available from Clevercut) and was stamped with ColorBox Wisteria Fluid Chalk ink.
Narrow lilac satin ribbon and lime green organza ribbon were threaded through the tag.
Lilac Papermania paper flowers (from an old Goody Bag) were coloured using Whispers Brushstroke markers. This was done by adding different colours of markers to different parts of the flower (pastel blue/green in the centre, with a few dots of purple, and purple on the petal tips) and then flooded with water to make the colours run, making the colouring of the flowers more realistic than the single shade they come in.
Once they were dry, they were shaped using an embossing tool and the mini purple See D's stamping mat.
Clear faux gems were attached to the centres of the flowers.
Craft Planet Iridescent Sparkle glitter glue was added to the flowers in the image.
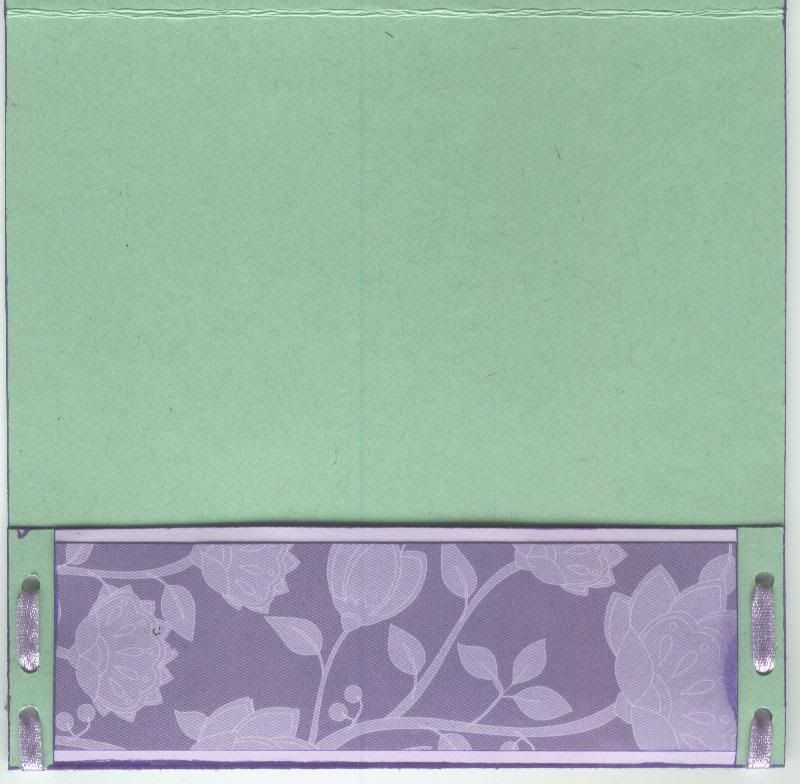 The pocket section on the inside was created by punching three holes down each side and lacing lilac satin ribbon through the holes and tying in a knot at the back.
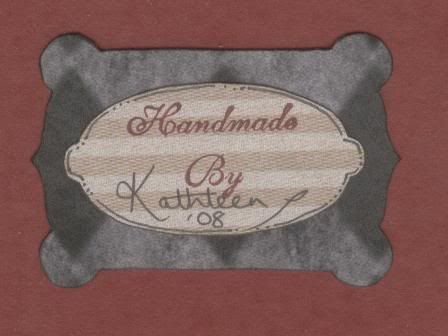
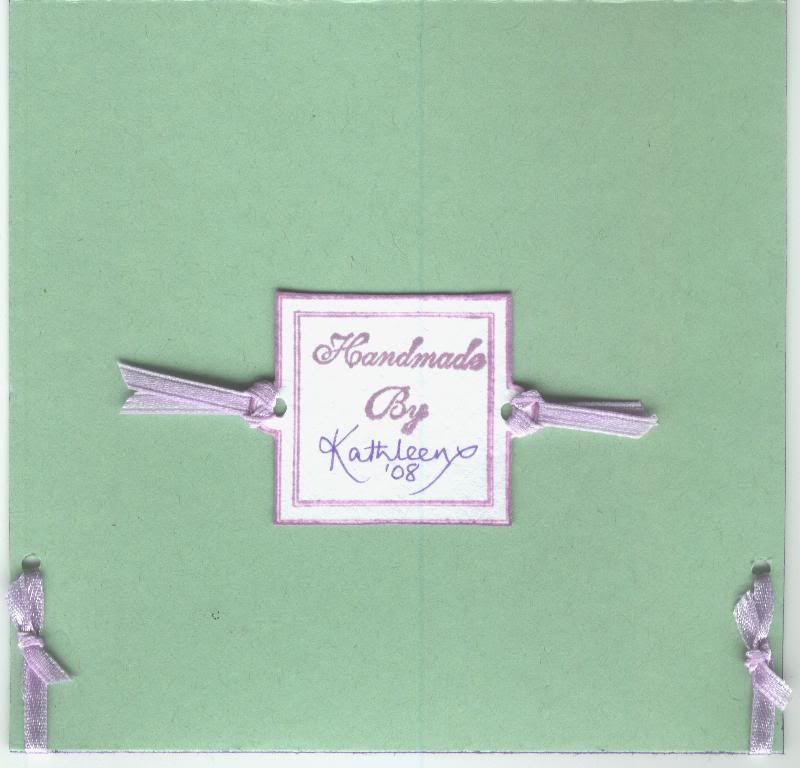 The reverse of the card was finished by stamping one of the bookplate stamps from the Stamps Away Bookplates, Anchors and Corners stamp set (available from Clevercut) using ColorBox Wisteria Fluid Chalk ink and my 'Handmade by' stamp from the Aspects of Design Botanical stamp sheet (available from The Stampman).
The Kerry Jo Balloon Girl (available from the Debbi Moore website) was watercoloured using the Whispers Brushstroke markers, and mounted onto green card.
The patterned papers are from the DCWV Floral Prints paper stack. These were matted onto lilac paper.
The sentiment tag is taken from the Stamps Away Everyday Tag-Its set (available from Clevercut) and was stamped with ColorBox Wisteria Fluid Chalk ink.
Narrow lilac satin ribbon and lime green organza ribbon were threaded through the tag.
Lilac Papermania paper flowers (from an old Goody Bag) were coloured using Whispers Brushstroke markers. This was done by adding different colours of markers to different parts of the flower (pastel blue/green in the centre, with a few dots of purple, and purple on the petal tips) and then flooded with water to make the colours run, making the colouring of the flowers more realistic than the single shade they come in.
Once they were dry, they were shaped using an embossing tool and the mini purple See D's stamping mat.
Clear faux gems were attached to the centres of the flowers.
Craft Planet Iridescent Sparkle glitter glue was added to the flowers in the image.
The pocket section on the inside was created by punching three holes down each side and lacing lilac satin ribbon through the holes and tying in a knot at the back.The reverse of the card was finished by stamping one of the bookplate stamps from the Stamps Away Bookplates, Anchors and Corners stamp set (available from Clevercut) using ColorBox Wisteria Fluid Chalk ink and my 'Handmade by' stamp from the Aspects of Design Botanical stamp sheet (available from The Stampman).
Monday 24 November 2008
Using Copics
I don't have any of these pens (yet!?) but I found this really helpful blog by Marianne with loads of tips and techniques on using them to their best.
I thought I'd post it on here for two reasons - one is to keep it for if/when I get them and also so that anyone who does have them can easily find the blog.
The blog is called ilikemarkers and has lots of tutorials on using these great pens. I'll warn you now though - you'll probably spend a couple of days reading through all the posts. It's very comprehensive!
Here is an example if Marianne's work. A true work of art!!!
Red and Green Penguins
Wow - I'm on a roll now!!!
This is my fourth Christmas card design.

I started by stamping the penguin image from the See D's Christmas Fun stamp set and watercoloured using Whispers Brushstroke markers and Sakura Stardust pens. White Sakura Souffle pen was added to the penguins' bellies and Papermania Glitter Flock was added to the penguins' hats.
The penguin image was matted onto DCWV red textured cardstock. Patterned paper from the DCWV Scrapbook in a Stack was matted onto olive green paper and a length of red grosgrain ribbon was attached across this panel.
The greeting is from the Dovecraft Studio G Stylized Christmas Tree mini set, stamped with Brilliance Rocket Red ink and matted onto the red textured cardstock.
So, that's 13 down, still many more to go!
I'm entering this one in the ABC blog challenge - this week's theme is 'R is for Ribbon'.
This is my fourth Christmas card design.
I started by stamping the penguin image from the See D's Christmas Fun stamp set and watercoloured using Whispers Brushstroke markers and Sakura Stardust pens. White Sakura Souffle pen was added to the penguins' bellies and Papermania Glitter Flock was added to the penguins' hats.
The penguin image was matted onto DCWV red textured cardstock. Patterned paper from the DCWV Scrapbook in a Stack was matted onto olive green paper and a length of red grosgrain ribbon was attached across this panel.
The greeting is from the Dovecraft Studio G Stylized Christmas Tree mini set, stamped with Brilliance Rocket Red ink and matted onto the red textured cardstock.
So, that's 13 down, still many more to go!
I'm entering this one in the ABC blog challenge - this week's theme is 'R is for Ribbon'.
Friday 21 November 2008
YIPPEE!!!!!! I've made some Christmas cards!
I have finally made some Christmas cards - nine in total!!!
I have three designs and three of each.
They are all variations on a theme as they were all made using the tag stamp from the Papermania Let It Snow set, but each is completely different.
However, this was definitely a lesson in pick your patterned paper first and then choose which coloured card to work with.
 The first card I started with some lovely Aegean blue card, but having made up the tags I discovered I didn't have any blue patterned papers to complement the tag!!!
The tag was stamped onto the blue card using the large tag stamp from the Papermania Let It Snow stamp set and silver embossed.
The centre section was stamped and embossed again onto white hammer card and small snowflakes from the HOTP Christmas Motifs stamp set were stamped on it using Whispers Azure Seas Permanent Dye ink.
The Snowflake/Let It Snow stamp was stamped using Ink It Up! Bright Blue Pigment ink and silver embossed. The words and snowflake were coloured with a blue Sakura Stardust pen and highlighted with white Sakura Souffle pen. The edges of the image panel were pricked with a pricking tool, and silver metallic weave ribbon was threaded through the tag.
Blue card to match the tag was matted on to silver mirror card. A strip of Anita's Classic Christmas Silver vellum was stamped using the Wavy Merry Christmas Border stamp from the See D's Christmas Messages stamp set using Ink It Up! Bright Blue Pigment ink and silver embossed. The vellum was attached to the card pieces using mini silver brads at the ends.
Snowflakes were stamped in the bottom right hand corner using Ink It Up! Bright Blue Pigment ink and silver embossed.
I thought the second design would be easier as I started with a lime green tag and I knew I had lime green patterned papers - but then I discovered that the tag didn't really show up on the green so had to pick complementary colours to show it off.
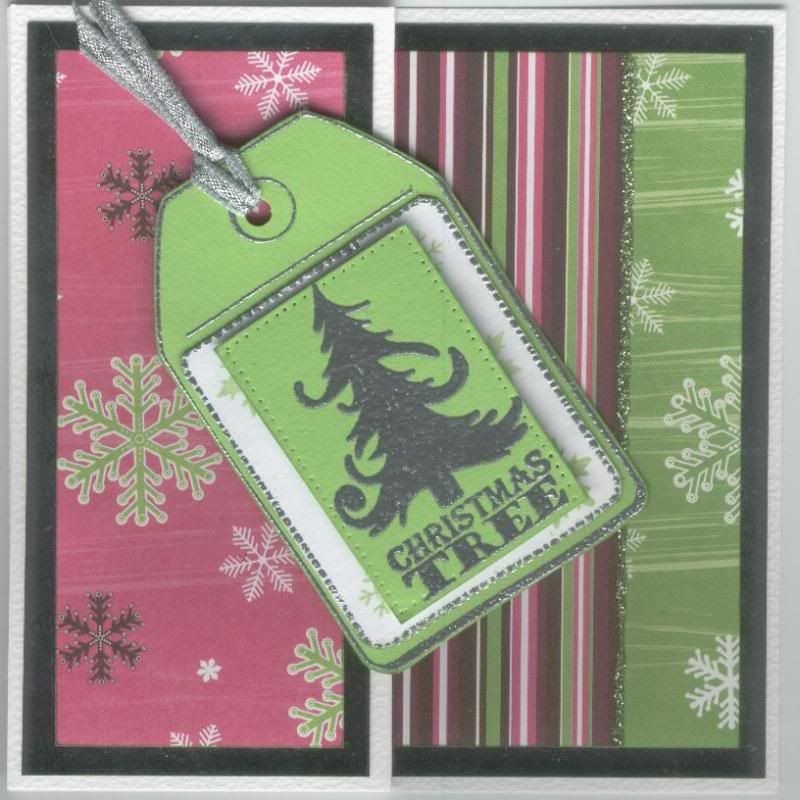 The tag was made in the same way as the blue one but with lime green card, the snowflakes were stamped using Whispers Savoy Green Permanent Dye ink, and the Christmas Tree image and text, also from the Papermania Let It Snow stamp set, was stamped using ColorBox Apple Green Pigment ink and silver embossed.
A square card was folded to create a fold-back card.
Two pieces of paper from the Papermania Naughty and Nice Christmas paper pack were attached to a piece of silver mirror card and attached to the inside of the card. A line of Glitz It Pear Green Glitter Glue was added along the join line.
A matching piece of paper from the Naughty and Nice paper was matted onto silver mirror card and attached to the fold-back section of the card. The tag was attached over the folded edge of the card.
The third card was just as difficult. The green card was just the wrong shade of green to go with most of the green patterned papers I have and in the end I opted for a black and white card with a hint of green!!!
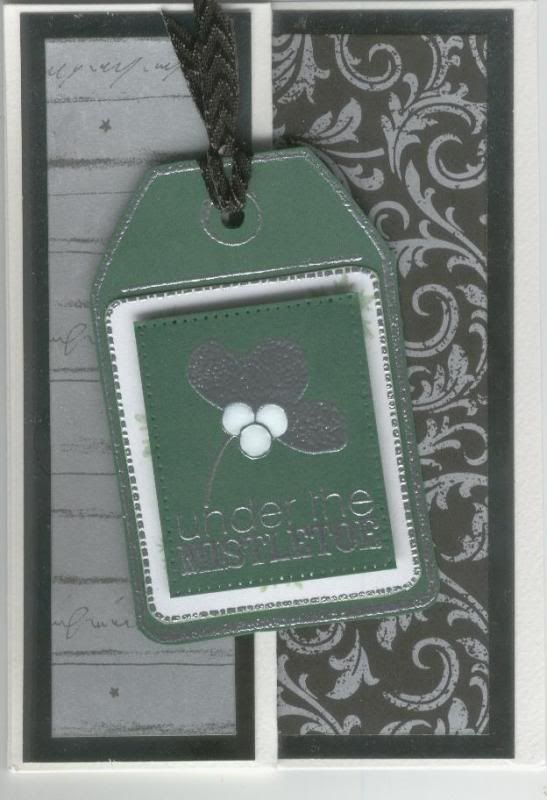 Again, the tag was made up in the same way using dark green card, but the snowflakes were stamped using Whispers Pine Green Permanent Dye ink and the mistletoe image and text from the Papermania Let It Snow stamp set was stamped using ColorBox Apple Green Pigment ink and silver embossed. The mistletoe berries were coloured using a white Sakura Souffle pen.
The fold-back card this time was made from an A6 card blank and the patterned papers, also matted on silver mirror card, are from the Anita's Classic Christmas Black paper pack.
I have three designs and three of each.
They are all variations on a theme as they were all made using the tag stamp from the Papermania Let It Snow set, but each is completely different.
However, this was definitely a lesson in pick your patterned paper first and then choose which coloured card to work with.
The first card I started with some lovely Aegean blue card, but having made up the tags I discovered I didn't have any blue patterned papers to complement the tag!!!The tag was stamped onto the blue card using the large tag stamp from the Papermania Let It Snow stamp set and silver embossed.
The centre section was stamped and embossed again onto white hammer card and small snowflakes from the HOTP Christmas Motifs stamp set were stamped on it using Whispers Azure Seas Permanent Dye ink.
The Snowflake/Let It Snow stamp was stamped using Ink It Up! Bright Blue Pigment ink and silver embossed. The words and snowflake were coloured with a blue Sakura Stardust pen and highlighted with white Sakura Souffle pen. The edges of the image panel were pricked with a pricking tool, and silver metallic weave ribbon was threaded through the tag.
Blue card to match the tag was matted on to silver mirror card. A strip of Anita's Classic Christmas Silver vellum was stamped using the Wavy Merry Christmas Border stamp from the See D's Christmas Messages stamp set using Ink It Up! Bright Blue Pigment ink and silver embossed. The vellum was attached to the card pieces using mini silver brads at the ends.
Snowflakes were stamped in the bottom right hand corner using Ink It Up! Bright Blue Pigment ink and silver embossed.
I thought the second design would be easier as I started with a lime green tag and I knew I had lime green patterned papers - but then I discovered that the tag didn't really show up on the green so had to pick complementary colours to show it off.
The tag was made in the same way as the blue one but with lime green card, the snowflakes were stamped using Whispers Savoy Green Permanent Dye ink, and the Christmas Tree image and text, also from the Papermania Let It Snow stamp set, was stamped using ColorBox Apple Green Pigment ink and silver embossed.A square card was folded to create a fold-back card.
Two pieces of paper from the Papermania Naughty and Nice Christmas paper pack were attached to a piece of silver mirror card and attached to the inside of the card. A line of Glitz It Pear Green Glitter Glue was added along the join line.
A matching piece of paper from the Naughty and Nice paper was matted onto silver mirror card and attached to the fold-back section of the card. The tag was attached over the folded edge of the card.
The third card was just as difficult. The green card was just the wrong shade of green to go with most of the green patterned papers I have and in the end I opted for a black and white card with a hint of green!!!
Again, the tag was made up in the same way using dark green card, but the snowflakes were stamped using Whispers Pine Green Permanent Dye ink and the mistletoe image and text from the Papermania Let It Snow stamp set was stamped using ColorBox Apple Green Pigment ink and silver embossed. The mistletoe berries were coloured using a white Sakura Souffle pen.The fold-back card this time was made from an A6 card blank and the patterned papers, also matted on silver mirror card, are from the Anita's Classic Christmas Black paper pack.
Thursday 20 November 2008
Brand New Stamp Company Launched
I just wanted to draw your attention to a brand new rubber stamp company that has just launched in the USA.
It is owned and run by Denise of the Stamp Something blog challenges and is called Whimsy Stamps. The website and online shop will be up and running next week and you can keep up to date with all the news over on Denise's blog.
News of the launch can be found here.
To celebrate the launch, Denise is offering the chance to win one of the stamps as blog candy, so pop over and have a peek!!
Amazing Blog Candy from Debbie - CLOSED
Debbie has some amazing blog candy over on her blog to celebrate 12,000 hits.
You can see what's up for grabs here.
Not only does she have a couple of lovely Sugar Nellie stamps, there is also a 12x12 K&Co Swell Noel paper pad and the matching Pleated Grand Adhesions.
BUT the piece de resistance is a selection of 17 Copic Sketch markers.
WoW!!!
This will be drawn on the 26th November.
Wednesday 19 November 2008
Flutterby Crafts Design Team Entry - Everything's Coming Up Roses
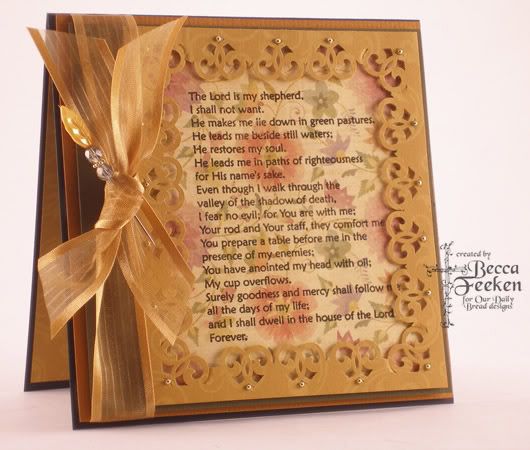
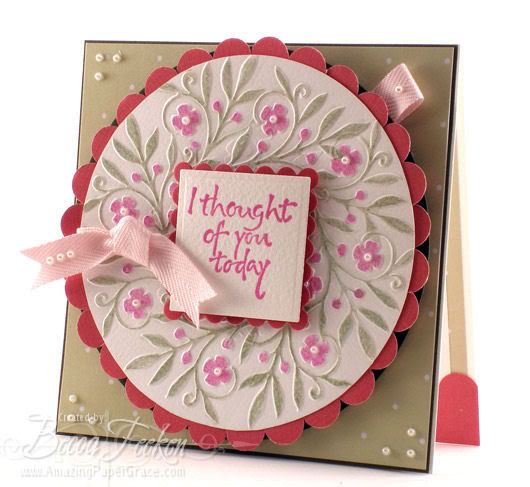
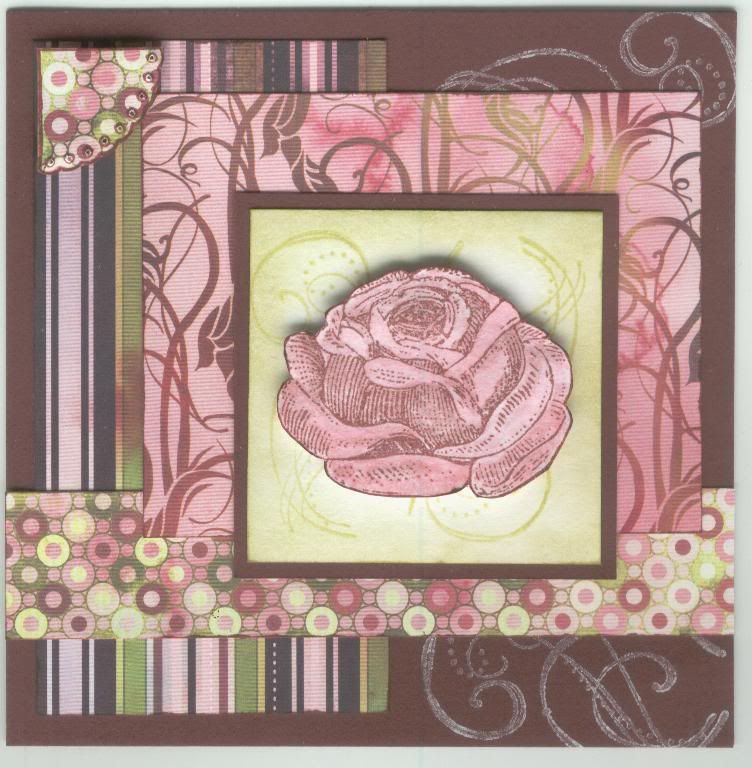 Here is my entry for this month's blog challenge over at Flutterby Crafts. The theme for this month is 'Everything's Coming Up Roses', and the lucky winner each month will win a £10 voucher to spend in the shop.
The size of this card is 12.5cm square and is made from burgundy card from the Papermill Shop.
The rose was stamped using the large rose stamp from the Non Sequitur Memories Of Italy set, Versafine Crimson Red archival pigment ink and watercoloured using Whispers Cherry Red and Chestnut Brown permanent dye inks from the caddy.
This was matted onto a piece of white card colour tinted with Tim Holtz Shabby Shutters Distress ink and overstamped using one of the flourish stamps from the Autumn Leaves Rhonna Farrer Flourishes v.1 set and Whispers Savoy Green permanent dye ink.
This was matted onto burgundy card to match the card blank.
The corners of the card blank were stamped using the same flourish stamp and Brilliance Moonlight White pigment ink.
The patterned papers are from the Basic Grey Eva paper pad (a purchase from my recent excursion to the Glitter Pot!!).
The decorative corner was created by stamping one of the corner stamps from the Stamps Away Book Plates, Anchors and Corners set on a piece of matching Eva paper and cut out. A paper piercer was used to add holes through the small circles.
The other design team members that have added their cards to this challenge are:
You can view their cards on the Flutterby Crafts blog or by clicking on the link above and going to their own blogs.
EXCITING NEWS - I'M ON A DESIGN TEAM!!!
I just wanted to let you all know that I have been selected to be on the Design Team of my local craft shop, Flutterby Crafts.
They are starting a new online challenge on their blog later today, and, as far as I know, a prize will be up for grabs. Once it is up and running I will add my card to my blog.
Please head over there and have a look. They are in the midst of developing their online store but the bricks-and-mortar shop in Thatcham Berkshire is a very welcoming place full of goodies (and they are hoping to start stocking Penny Black stamps soon much to Tracy's delight!!).
Some Organizing Tips from Becca
I've been having a trawl through Becca's blog - as you can see from my earlier post and she has some great tips on organizing your stash and also having a record of what you've already got.
So far I've discovered a ribbon swatch book, 2 catalogues of dies and punches here and here and a colour swatch book of colouring media.
So far I've discovered a ribbon swatch book, 2 catalogues of dies and punches here and here and a colour swatch book of colouring media.
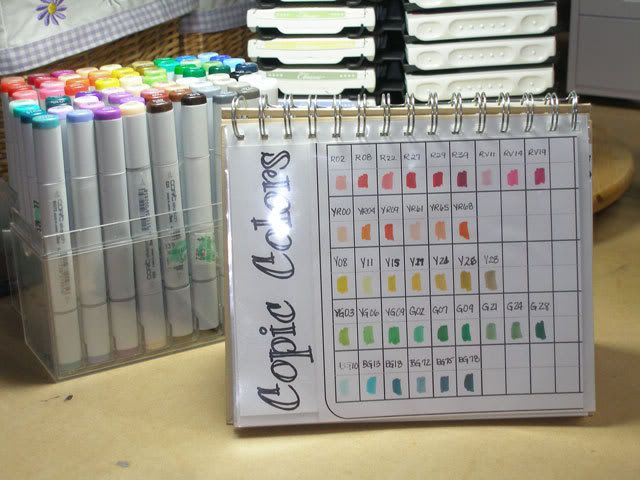
I found the latter particularly interesting. It can be used to assess the true colours of your pens, pencils, inkpads etc without having to scribble on a bit of scrap paper every time you use them, and also to stop you duplicating your stash when you see a sale just in case you haven't got that colour!!
It is definitely one of those projects that I will endeavour to tackle in the new year - along with my ribbon holder!! My other task is to add a sticker to the bottom of all my inkpads showing the colour of the ink so I can see immediately what colour they stamp out at.
Becca also has a great ribbon storage idea here that might be of interest to some of you. My only concern would be that the ribbon would crease if wrapped around the board.
Creating A Frame Using Corner Punches
I have come across a great tutorial using corner punches to make a frame over on Becca's blog.
The effects are great and she explains it really well.
Pop over and take a look.
Here is a picture of what she achieved!!
I think you will need a corner punch where you can remove the wings to use it as a normal punch to create this effect.
She has a few other tutorials on her blog as well.
Tuesday 18 November 2008
New Debbi Moore Online Video Demonstrations
Debbi Moore has launched a new site that will have videos demonstrating crafting projects.
The first episode to watch is called The Taste of the Orient.
There are projects showing you how to do mini books, template cards and waterfall cards, and the spinning technique.
I'm sure there will be some great shows in the future with some great inspirational projects.
The first episode to watch is called The Taste of the Orient.
There are projects showing you how to do mini books, template cards and waterfall cards, and the spinning technique.
I'm sure there will be some great shows in the future with some great inspirational projects.
Monday 17 November 2008
Blog Candy Up For Grabs From Ria - CLOSED
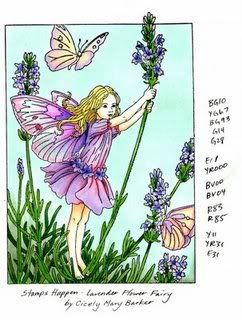
Ria has some funky Fairy blog candy up for grabs here.
You can see what's up for grabs below and there will be some extra surprise bits included too.
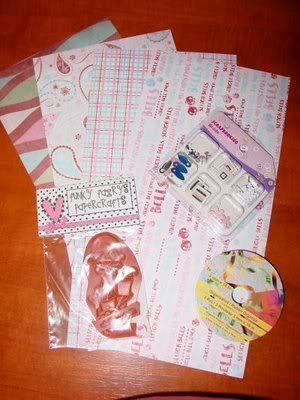
This will be drawn on the 22nd November.
You can see what's up for grabs below and there will be some extra surprise bits included too.
This will be drawn on the 22nd November.
Template Website
I have come across a great website with some printable templates and thought I'd flag it up!
It is Paperscrapz, and has templates for shaped cards, baskets and gifts, just to mention a few!!!
There are also links to other template sites on there, so a good go-to site if you ever need templates!
It is Paperscrapz, and has templates for shaped cards, baskets and gifts, just to mention a few!!!
There are also links to other template sites on there, so a good go-to site if you ever need templates!
Sunday 16 November 2008
Janet's Great New Venture and Some Blog Candy - CLOSED
Janet, aka Craftycairn, aka Pink Gem, has lauched some new stamps that are available from her new website.
 To celebrate this new launch, she is offering a couple of the new stamps as blog candy here.
All you have to do to enter the draw is leave a comment on her BC post and then post on your blog about Pink Gem Designs. The draw will take place on Tuesday 18th November at 7pm.
To celebrate this new launch, she is offering a couple of the new stamps as blog candy here.All you have to do to enter the draw is leave a comment on her BC post and then post on your blog about Pink Gem Designs. The draw will take place on Tuesday 18th November at 7pm.
Thursday 13 November 2008
Autumn Leaves Ticket Stamps Tutorial

I recently purchased this set of stamps and I know they are increasingly popular.
I have discovered a great tutorial over on Aud's blog explaining a great way of making them look more like tickets.
Head over here to see how she achieves it.
A Great Day of Stamping, Crafting and Making Friends
I meant to post this on Sunday but I had great problems with my Internet connection, and then I've just not had a chance to sit down and get on with it since.
Anyway, I'm talking about last Saturday - although the day actually started on the Friday as I didn't sleep at all on Friday night (believe me, this took its toll later on in the day!!)
I was up at 5.45am (I didn't realize there WERE two 5.45's in the day!), showered, dressed and in the car and heading for Newbury train station by 6.45am. I was on my first train at 7.05am and on my way to West Sussex. I only had one problem with the trains -probably due to the wrong sort of rain on the line, so missed my connection at Redhill, but thankfully I eventually arrived at Haywards Heath just 30 minutes later than anticipated.
There I was met by the lovely Alex (I sort of recognized her from her blog picture and was hoping I wasn't smiling like a mad person at a complete stranger!!) and from there we headed to the Glitter Pot where we met up with Julie and Sarah, who had made the trip from London and Surrey respectively. Michelle Saxon was there demonstrating the BIA and the Dreamkuts, and we all took notes as we all wanted to have a play with the BIA later on in the day. Having spent far too much money in The Glitterpot, we then headed off to Alex's house for an afternoon of crafting.
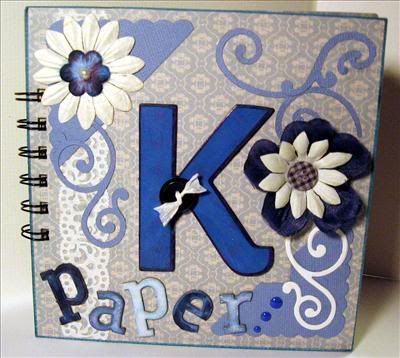
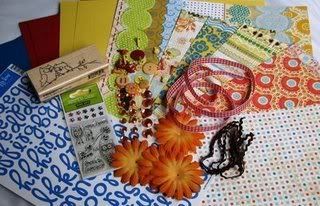
We all decided to get lunch out of the way, but not before some great gifts were exchanged. Alex gave us all some wonderful hand-made goody bags, each containing a lovely calendar, some stamped images from the new Magnolia Christmas collection, and some beautiful papers. Julie had made us all a lovely book of papers, made with her BIA,
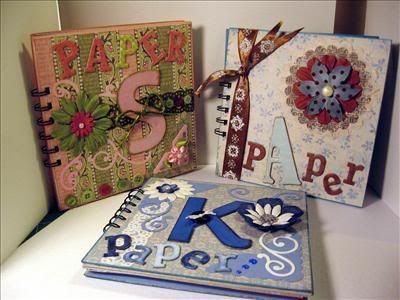
here is the book she gave to me:
and Sarah gave us all a box of Belgian Praline chocolates (one of my favourites!)
After lunch, we decided to make the most of Alex's graphic design background and get her to give us all a crash course on using the Copic Markers. When used properly, the effects really are amazing. The colours are so vibrant and they blend beautifully - but, only when done properly!! I think I'd want to practise a bit more before I committed to spending all that money on them.
After our colouring lesson, we all took advantage of Alex's amazing collection of stamps and started stamping some images out. This was accompanied by a delicious Donauwellen cake that Alex had made herself, and reminded me of 'Kaffee and Kuchen' when I lived in Germany. I love all those rich German cakes and this was no exception.
Then, with the exception of Julie who made a start on her calendar, we all started to make mini books following the instructions given by Michelle Saxon earlier in the day (although of course there's always one person who manages to mess their design up completely due to not paying attention - stop pointing fingers at me!! :}).
At about 5pm, my eyes started to get very sore and itchy, no doubt a result of the fact that I hadn't slept the night before!!
Unfortunately, the day had to come to an end. Julie and Sarah bid their farewells at 6pm and headed home. I stayed a bit later as my train wasn't until 7.30pm. Alex dropped me off at the train station and we both expressed our hopes that we'd be able to do this all again!! I have to admit I really enjoyed the day and would love to do it all again, but it was a very long and tiring day!!
Thankfully all my trains were on time on the way home. I almost missed getting off the train at Gatwick but realized just in time where I was and managed to jump off. I didn't fall asleep at all on the journey home amazingly, and was picked up from Newbury station by my lovely hubby at 10.20pm.
If I ever manage to sort out my mini book I'll post a picture of it on here for you.
Anyway, I'm talking about last Saturday - although the day actually started on the Friday as I didn't sleep at all on Friday night (believe me, this took its toll later on in the day!!)
I was up at 5.45am (I didn't realize there WERE two 5.45's in the day!), showered, dressed and in the car and heading for Newbury train station by 6.45am. I was on my first train at 7.05am and on my way to West Sussex. I only had one problem with the trains -probably due to the wrong sort of rain on the line, so missed my connection at Redhill, but thankfully I eventually arrived at Haywards Heath just 30 minutes later than anticipated.
There I was met by the lovely Alex (I sort of recognized her from her blog picture and was hoping I wasn't smiling like a mad person at a complete stranger!!) and from there we headed to the Glitter Pot where we met up with Julie and Sarah, who had made the trip from London and Surrey respectively. Michelle Saxon was there demonstrating the BIA and the Dreamkuts, and we all took notes as we all wanted to have a play with the BIA later on in the day. Having spent far too much money in The Glitterpot, we then headed off to Alex's house for an afternoon of crafting.
We all decided to get lunch out of the way, but not before some great gifts were exchanged. Alex gave us all some wonderful hand-made goody bags, each containing a lovely calendar, some stamped images from the new Magnolia Christmas collection, and some beautiful papers. Julie had made us all a lovely book of papers, made with her BIA,
here is the book she gave to me:
and Sarah gave us all a box of Belgian Praline chocolates (one of my favourites!)
After lunch, we decided to make the most of Alex's graphic design background and get her to give us all a crash course on using the Copic Markers. When used properly, the effects really are amazing. The colours are so vibrant and they blend beautifully - but, only when done properly!! I think I'd want to practise a bit more before I committed to spending all that money on them.
After our colouring lesson, we all took advantage of Alex's amazing collection of stamps and started stamping some images out. This was accompanied by a delicious Donauwellen cake that Alex had made herself, and reminded me of 'Kaffee and Kuchen' when I lived in Germany. I love all those rich German cakes and this was no exception.
Then, with the exception of Julie who made a start on her calendar, we all started to make mini books following the instructions given by Michelle Saxon earlier in the day (although of course there's always one person who manages to mess their design up completely due to not paying attention - stop pointing fingers at me!! :}).
At about 5pm, my eyes started to get very sore and itchy, no doubt a result of the fact that I hadn't slept the night before!!
Unfortunately, the day had to come to an end. Julie and Sarah bid their farewells at 6pm and headed home. I stayed a bit later as my train wasn't until 7.30pm. Alex dropped me off at the train station and we both expressed our hopes that we'd be able to do this all again!! I have to admit I really enjoyed the day and would love to do it all again, but it was a very long and tiring day!!
Thankfully all my trains were on time on the way home. I almost missed getting off the train at Gatwick but realized just in time where I was and managed to jump off. I didn't fall asleep at all on the journey home amazingly, and was picked up from Newbury station by my lovely hubby at 10.20pm.
If I ever manage to sort out my mini book I'll post a picture of it on here for you.
Friday 7 November 2008
Blog Candy from Carly - CLOSED
Carly is very generously offering a bumper pack of blog candy over on her blog.
To be in with a chance of winning, all you have to do is add Carly's blog to your list of favourite blogs, leave a comment on her blog candy post, mention her blog candy offer on your blog and follow her blog.
This will close on the 8th December so Carly can get your stash out to you before Christmas! She will also ship worldwide so anyone can join in!!
Thursday 6 November 2008
I've Been Tagged!!!
I've been tagged by the great Tara!
This is how it works. YOu have to link to the person who tagged you and list the rules on the blog.
Then answer the five questions and tag five people. Add links to their blogs, and let them know they've been tagged by leaving a comment on their blog.
Things I Love
1. The feel of the sun on my skin
2. Going on holiday and relaxing
3. A lovely cup of hot tea
4. Spending quality time with my DH
5. Buying new crafty stash
Things I Hate
1. Not having a large dedicated craft room!!
2. The cold!
3. Blackcurrants
4. Migraines (luckily I don't get them very often now)
5. Worms/Snakes
Music on iPod or Playlist
1. The Goo Goo Dolls - Iris
2. Take That - Shine
3. New Kids On The Block - The Right Stuff
4. Girls Aloud - The Show
5. Hallelujah - Rufus Wainwright
Fav Foods/Drinks
1. Thai Food
2. Malibu and Coke
3. Anything with prawns and/or seafood in it
4. Turkish Delight
5. Bacon Rolls
Now to pass this on..... I think I'll tag Alex, Kim, Natalie, Julie and Jo
Blog Candy from Bev and Elaine - CLOSED
Bev, from the Whiff of Joy design team, has some great blog candy up for grabs. She has one of the great WOJ stamps up for grabs over on her blog. This is open until the 12th November.
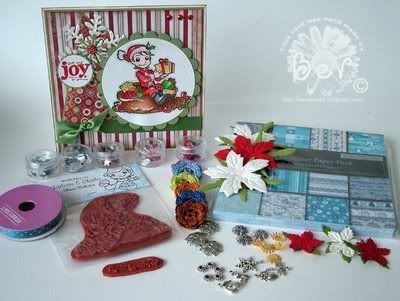
There is also blog candy over on Elaine's blog. She has some Promarkers up for grabs. I haven't tried this colouring technique yet so this would be a great starter kit!! (HINT HINT!! LOL!!)
You can see what's up for grabs here and here. This is open until 15th November.
There is also blog candy over on Elaine's blog. She has some Promarkers up for grabs. I haven't tried this colouring technique yet so this would be a great starter kit!! (HINT HINT!! LOL!!)
You can see what's up for grabs here and here. This is open until 15th November.
Lots and Lots of Blog Candy from Clare - CLOSED
The lovely Clare Curd of docrafts (you might have seen her on QVC recently) is offering LOADS of blog candy over on her blog.
She is offering a different BC every other day for two weeks. It started on Tuesday and you have a week to add you comments to be in with a chance.
Unfortunately there don't appear to be Permalinks on the docrafts blogs so I can't pinpoint the actual posts so you'll just have to scroll through the whole thing to find all the different BC posts. That won't be too great a hardship though as Clare is a great designer and you're sure to get some great inspiration from her cards on there.
DH's Anniversary Card For Our 10th Anniversary
I am taking a huge risk posting this on here. DH (Phil) hasn't had a look on here since I started this blog. He occasionally asks me what it is that I post on here, and stares at me with that look of incredulity (you all know the one) when I get excited that someone has left a comment, or I hit another 100 views on my blog counter.
So, with that in mind, I'm daring to post the anniversary card that I've made for our 10th Wedding Anniversary that we will be celebrating in December. I'm trying to get ahead with my 'normal' cards so that I can make a start on my Christmas cards and not have to worry that I haven't got my cards made for January after the holidays.
Anyway, apart from the imminent 'New Baby' card that is due to be made for the end of November, I am now up to date with my 'normal' cards, with them all made up to the end of January. Tomorrow, the big tidy up can commence in my craft room and I can get my Christmas stash out!!
So, this was the last card to be made, and hopefully it will go down well!

The card blank is deep red hammer card, and was folded to make a zigzag card. The patterned papers are from the Hot Off The Press (HOTP) Classic Creative Cardmakers Pack. The chosen papers were cut to shape and the edges inked with a black inkpad.
For the back page, I took the rectangle of patterned paper, and cut out a frame from the lower half. A piece of white paper was attached behind the frame, giving an area on which to stamp the greeting. The positioning of the frame ensures that it cannot be seen when the card is closed. A photo corner was cut from matching deep red hammer card using the Ellison Photo Corners Thin Cut die.

The other patterned paper panels were attached to the card blank, and punched border strips were then added along the cut edges. These are actually the waste from the lace borders that I added to the pink/black anniversary cards I made the other week using the Fiskars Lace Border punch, and thought these would come in handy for another project - and I was right. These are a lot less fussy and feminine than the lace part, and I think they work with the design.
The tag is artwork included in the HOTP Classic Creative Pack, which was simply cut out, and a black eyelet added (using my now very trusty Big Bite!) and some beige ribbon threaded through. A HOTP Word Fragment was 3D'd to the tag, and this was then adhered to the second panel of the card.
On the front panel, I used my HOTP Labels template to create the name plaque, using matching papers from the HOTP Classic Creative Pack. The letters are from the ColorBok Alphabet set. They are white paper letter die cuts that were coloured using the Brilliance Rocket Red pigment ink and over stamped using the Brilliance Graphite Black pigment ink and the Stone Texture stamp from the Judikins Artifacts cube.
Four lengths of brown ladder ribbon were attached to the front panel and the name plaque, complete with monograms (our initials) was added over the top of the ends of the ribbon.
I am entering this card into the Double Dutch Blog Challenge, the current challenge being to use only three techniques from the list on their blog.
The three techniques I have used are:
STAMPING
PUNCHING
EMBELLISHMENT MAKING
Head over there to see what the design team have come up with, and enter your creation.
So, with that in mind, I'm daring to post the anniversary card that I've made for our 10th Wedding Anniversary that we will be celebrating in December. I'm trying to get ahead with my 'normal' cards so that I can make a start on my Christmas cards and not have to worry that I haven't got my cards made for January after the holidays.
Anyway, apart from the imminent 'New Baby' card that is due to be made for the end of November, I am now up to date with my 'normal' cards, with them all made up to the end of January. Tomorrow, the big tidy up can commence in my craft room and I can get my Christmas stash out!!
So, this was the last card to be made, and hopefully it will go down well!
The card blank is deep red hammer card, and was folded to make a zigzag card. The patterned papers are from the Hot Off The Press (HOTP) Classic Creative Cardmakers Pack. The chosen papers were cut to shape and the edges inked with a black inkpad.
For the back page, I took the rectangle of patterned paper, and cut out a frame from the lower half. A piece of white paper was attached behind the frame, giving an area on which to stamp the greeting. The positioning of the frame ensures that it cannot be seen when the card is closed. A photo corner was cut from matching deep red hammer card using the Ellison Photo Corners Thin Cut die.
The other patterned paper panels were attached to the card blank, and punched border strips were then added along the cut edges. These are actually the waste from the lace borders that I added to the pink/black anniversary cards I made the other week using the Fiskars Lace Border punch, and thought these would come in handy for another project - and I was right. These are a lot less fussy and feminine than the lace part, and I think they work with the design.
The tag is artwork included in the HOTP Classic Creative Pack, which was simply cut out, and a black eyelet added (using my now very trusty Big Bite!) and some beige ribbon threaded through. A HOTP Word Fragment was 3D'd to the tag, and this was then adhered to the second panel of the card.
On the front panel, I used my HOTP Labels template to create the name plaque, using matching papers from the HOTP Classic Creative Pack. The letters are from the ColorBok Alphabet set. They are white paper letter die cuts that were coloured using the Brilliance Rocket Red pigment ink and over stamped using the Brilliance Graphite Black pigment ink and the Stone Texture stamp from the Judikins Artifacts cube.
Four lengths of brown ladder ribbon were attached to the front panel and the name plaque, complete with monograms (our initials) was added over the top of the ends of the ribbon.
I am entering this card into the Double Dutch Blog Challenge, the current challenge being to use only three techniques from the list on their blog.
The three techniques I have used are:
STAMPING
PUNCHING
EMBELLISHMENT MAKING
Head over there to see what the design team have come up with, and enter your creation.
Circular Embossing With Dies
Now I don't have a large die-cutting machine (PITY!!!) but I figure that one day I might have (NOTE: DH - please look at Christmas wishlist!!) and I know a lot of you do so might find the tutorial that I discovered very helpful.
Basically, the idea is to get extra usage out of some of those dies (I suppose the same principle could be aplied to some stamps as well).
The tutorial is over on Becca's blog, and the effects are amazing.
Here is the effect she has managed to achieve with one of the smaller corner embossing folders.
I think you'll agree it's beautiful, so pop over and take a look at how it's done, and at all the other lovely cards on her blog.
Thursday 30 October 2008
Ribbon Storage Solution
I don't know about anyone else, but my ribbon storage leaves a lot to be desired.
My ribbons are stored in a number of ways.
The loose ribbons, the ones I've bought from haberdashers, Hobbycraft etc, are currently wrapped around the inner tubes of toilet rolls, but no matter which tape I use (Sellotape, masking tape, magic Scotch tape), invariably they come unstuck and start to unravel. I also have some ribbon on their reels, but most of them are the Dovecraft ones, and I'm sure you're all aware just how rubbish the reels are as they fall apart at the drop of a hat. I also have some that are stored around strips of card - and they get creases in them. I've also got a box of Brenda Pinnick ribbons that are stored not only on strips of card but are also still in the cardboard box they came in.
Other than the Brenda Pinnick ribbons, all my ribbons are stored by colour in Ziploc bags, but they are now so bulky due to the toilet roll inners, that they no longer fit into the large plastic box that they've always been stored in.
So, following numerous threads over on the docrafts cardmaking forum regarding storage solutions for ribbon, I did a Google search and came across a link to an e-book which gives instructions for a ribbon hanger and at the moment there is a bonus e-book with instructions for a re-order ring, where a sample of all your ribbons are stored with the details of the ribbon such as brand (if applicable), where you bought it and how much it cost. There is also the possibility of adding how much of it you have bought and making a note of how much you use so you can see when you are running low on anything.
So, the author of this book is an English lady called Sunday and she has a blog. I think she is mainly a scrapbooker, but if her ribbon storage solutions are anything to go by, I'm sure there will be lots of other interesting posts on there.
So, onto the e-book!
I had a couple of problems getting the download but Sunday was very helpful and got back to me as soon as she got my email and sorted everything out. (I think I was maybe a bit impatient and clicked on the wrong button).
The link for the e-book is here. I paid for mine through Paypal and it came to about £4.70 I think (it will depend on the exchange rate as for some reason it is priced in US$ at $7.50). I weighed everything up and figured if I went out and bought anything it would cost more than that.
The e-book is copyrighted so unfortunately I can't just post the instructions on here for you, but I think the price tag is well worth it (assuming I can get it to work!)
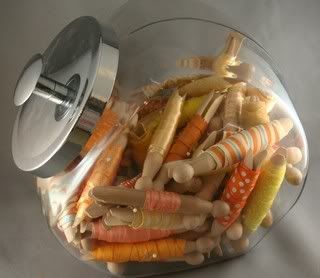 The solution I had been considering is the one over on Nicole Heady's blog with the dolly pegs and glass jars - but the dolly pegs would have been about £11 for 300 if I'd got them in Wilkinson's, that's before I got the glass jars to put them in. And they take up lots of shelf space which I don't have in my room.
 I also considered buying the plastic tags that hold two or three lengths of ribbon from Ribbon Oasis, but at £36 for 200, this would also start to get a bit pricey!!
So, the idea of hanging my ribbons up appealed to me. That way I'll get a better idea of what I've got, and with the re-order ring, where I got it from and how much it cost per metre for when I need to get some more. I could add a couple of hooks to the side of my shelf unit and hang them there. I might have to come up with a solution to them getting dusty - maybe a clear plastic bag over the top like dry-cleaning!
Now, I've read the instructions and they are very clear. BUT I haven't as yet made any, so this endorsement comes with a caveat - I will post again once I've made one and let you know how I get on.
My ribbons are stored in a number of ways.
The loose ribbons, the ones I've bought from haberdashers, Hobbycraft etc, are currently wrapped around the inner tubes of toilet rolls, but no matter which tape I use (Sellotape, masking tape, magic Scotch tape), invariably they come unstuck and start to unravel. I also have some ribbon on their reels, but most of them are the Dovecraft ones, and I'm sure you're all aware just how rubbish the reels are as they fall apart at the drop of a hat. I also have some that are stored around strips of card - and they get creases in them. I've also got a box of Brenda Pinnick ribbons that are stored not only on strips of card but are also still in the cardboard box they came in.
Other than the Brenda Pinnick ribbons, all my ribbons are stored by colour in Ziploc bags, but they are now so bulky due to the toilet roll inners, that they no longer fit into the large plastic box that they've always been stored in.
So, following numerous threads over on the docrafts cardmaking forum regarding storage solutions for ribbon, I did a Google search and came across a link to an e-book which gives instructions for a ribbon hanger and at the moment there is a bonus e-book with instructions for a re-order ring, where a sample of all your ribbons are stored with the details of the ribbon such as brand (if applicable), where you bought it and how much it cost. There is also the possibility of adding how much of it you have bought and making a note of how much you use so you can see when you are running low on anything.
So, the author of this book is an English lady called Sunday and she has a blog. I think she is mainly a scrapbooker, but if her ribbon storage solutions are anything to go by, I'm sure there will be lots of other interesting posts on there.
So, onto the e-book!
I had a couple of problems getting the download but Sunday was very helpful and got back to me as soon as she got my email and sorted everything out. (I think I was maybe a bit impatient and clicked on the wrong button).
The link for the e-book is here. I paid for mine through Paypal and it came to about £4.70 I think (it will depend on the exchange rate as for some reason it is priced in US$ at $7.50). I weighed everything up and figured if I went out and bought anything it would cost more than that.
The e-book is copyrighted so unfortunately I can't just post the instructions on here for you, but I think the price tag is well worth it (assuming I can get it to work!)
The solution I had been considering is the one over on Nicole Heady's blog with the dolly pegs and glass jars - but the dolly pegs would have been about £11 for 300 if I'd got them in Wilkinson's, that's before I got the glass jars to put them in. And they take up lots of shelf space which I don't have in my room. I also considered buying the plastic tags that hold two or three lengths of ribbon from Ribbon Oasis, but at £36 for 200, this would also start to get a bit pricey!!So, the idea of hanging my ribbons up appealed to me. That way I'll get a better idea of what I've got, and with the re-order ring, where I got it from and how much it cost per metre for when I need to get some more. I could add a couple of hooks to the side of my shelf unit and hang them there. I might have to come up with a solution to them getting dusty - maybe a clear plastic bag over the top like dry-cleaning!
Now, I've read the instructions and they are very clear. BUT I haven't as yet made any, so this endorsement comes with a caveat - I will post again once I've made one and let you know how I get on.
Tuesday 28 October 2008
Wedding and Hen Party Cards - SOLD!
I just wanted to update you all on the order I got from my friend for two cards, namely a hen party card and a wedding card. She came round today to collect them and she gave me the money before she'd even seen them 'in the flesh', so to speak.
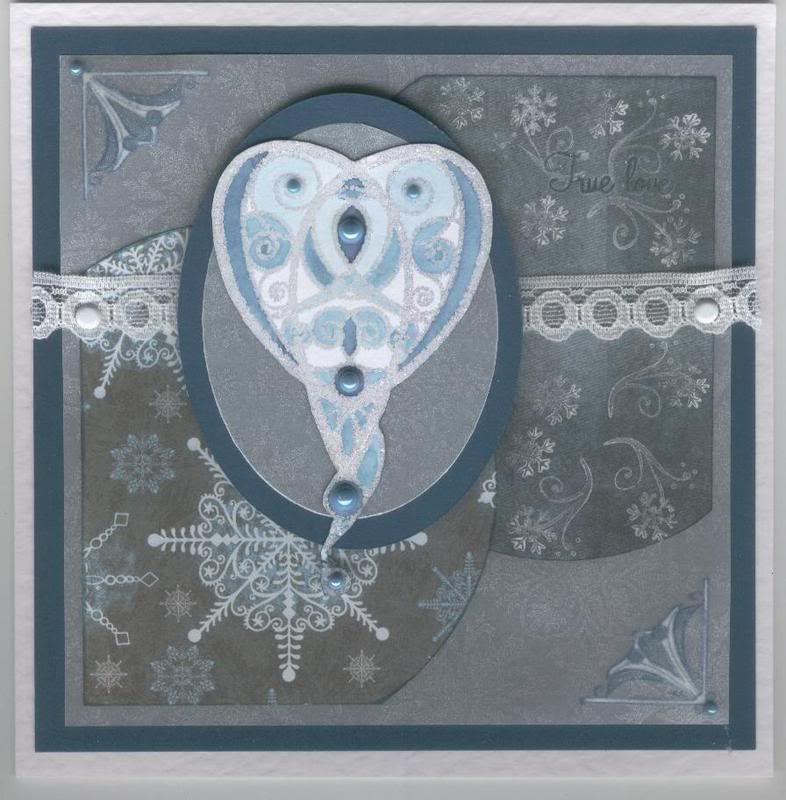
I'd emailed her pictures of them but I told her she should at least look at them before giving me any money!!
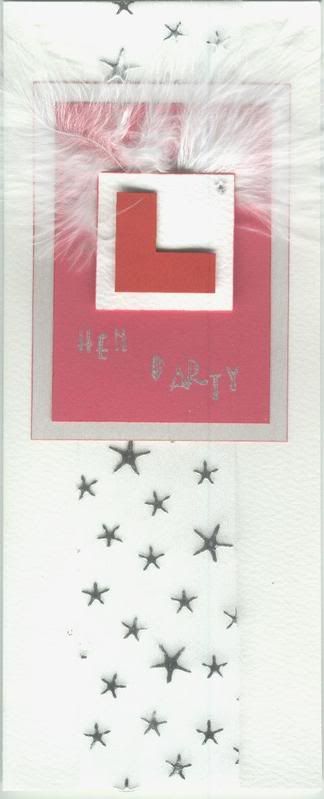
Anyway, she said she loved them and, as an added bonus, her sister had told her that the card I'd made for her wedding (also for my friend) was her favourite wedding card (I can feel my head growing!!!)
So, now I'm down to making just one more card before I start on my Christmas cards - I really can't believe that it's nearly November and I haven't made a start on them yet! The card in question is an anniversary card for my DH - it's our tenth anniversary in December so it's got to be a special one. I've got a design in mind and I'm going to use some HOTP papers. I'll post it on here when I've finished it (hopefully tomorrow).
I'd emailed her pictures of them but I told her she should at least look at them before giving me any money!!
Anyway, she said she loved them and, as an added bonus, her sister had told her that the card I'd made for her wedding (also for my friend) was her favourite wedding card (I can feel my head growing!!!)
So, now I'm down to making just one more card before I start on my Christmas cards - I really can't believe that it's nearly November and I haven't made a start on them yet! The card in question is an anniversary card for my DH - it's our tenth anniversary in December so it's got to be a special one. I've got a design in mind and I'm going to use some HOTP papers. I'll post it on here when I've finished it (hopefully tomorrow).
Saturday 25 October 2008
Blog Candy From FunkyFairyInspirations - CLOSED
Funky Fairy Inspirations have got some Blog Candy up for grabs for three lucky winners. Just head over to their blog and answer the question they've set and add a comment to their post.
You can have a look here for a picture of what's up for grabs between the three winners.
This "Blog Candy" giveaway will run up to 7th November 2008 with the winners being announced on Saturday 8th November 2008.
You can have a look here for a picture of what's up for grabs between the three winners.
This "Blog Candy" giveaway will run up to 7th November 2008 with the winners being announced on Saturday 8th November 2008.
Juliet's Blog Candy - CLOSED
Juliet is almost at 10,000 hits over on her blog and has some lovely blog candy up for grabs to celebrate the milestone.
It will be open until next Saturday when a winner will be chosen.
You can see what's up for grabs here.
Not only that, she also has some beautiful creations on her blog so pop over and have a look.
It will be open until next Saturday when a winner will be chosen.
You can see what's up for grabs here.
Not only that, she also has some beautiful creations on her blog so pop over and have a look.
Friday 24 October 2008
Pink Little Madam Birthday Card
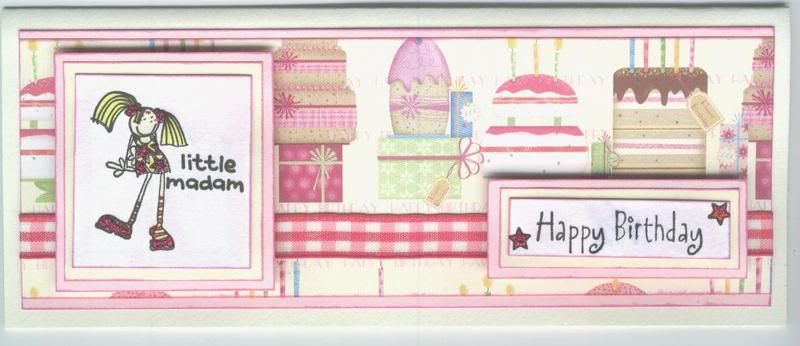
This card is for my cousin's little girl who is 5 this year. She's a lovely little girl but very independent, and at times a cute 'little madam'.
It is also my entry into this week's Cute Card Thursday Blog Challenge, the theme of which is 'Stars', which are apparent on the Little Madam's dress and on the sentiment panel.
The image, from the Bang On The Door Fairy Girls and Her Friends set, was stamped and coloured using Whispers Brushstroke markers and highlighted with Craft Planet Fuchsia glitter glue. The image was then matted onto cream paper and pink card.
The sentiment and stars, from the See D's Celebration Messages set, were stamped and the stars coloured and highlighted with CP Fuchsia glitter glue.
The patterned paper, from the Dovecraft Birthday designer paper pack, was matted onto pink card and cerise gingham ribbon attached across the panel.
Subscribe to:
Posts (Atom)


