Pages

WELCOME

This blog was created to act as a record of the cards and other projects that I have made. It is for both my own reference and to help inspire anyone who wants to take a look.

I'd love it if you'd leave me a comment so that I know what you think of my projects and that you've been to visit!

Anyone can comment, even those who don't have a blog. (Just look for the word 'Comments' under the three little pictures at the end of each post). Readers without a blog can add an anonymous comment, but please leave your name (and docrafts username if applicable) so I know who you are!

Slideshows of all the cards I've uploaded to my blog can be found at the bottom of the page.


PEOPLE WHO FOLLOW MY BLOG

Sunday 12 December 2010

Light Blue and Violet Foxglove Friends

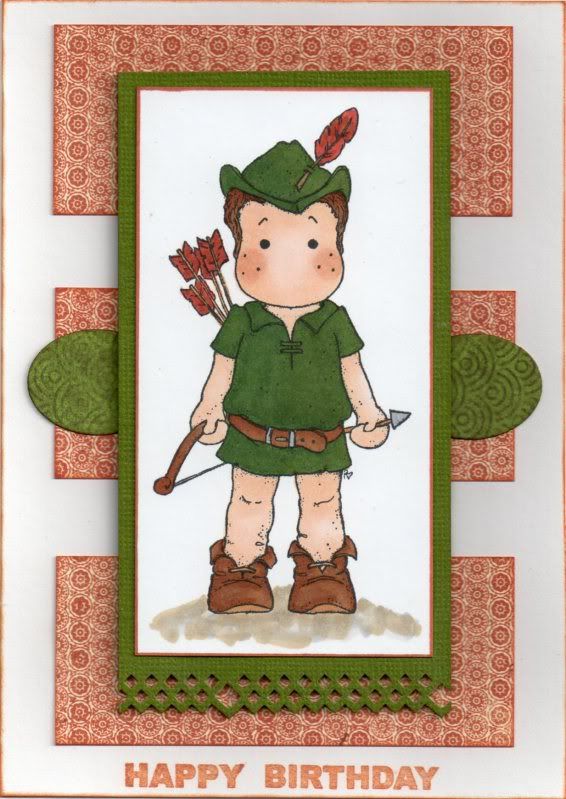
I can now blog this card as I know the recipient (Alex K/Eisbaerin) has now opened her card!

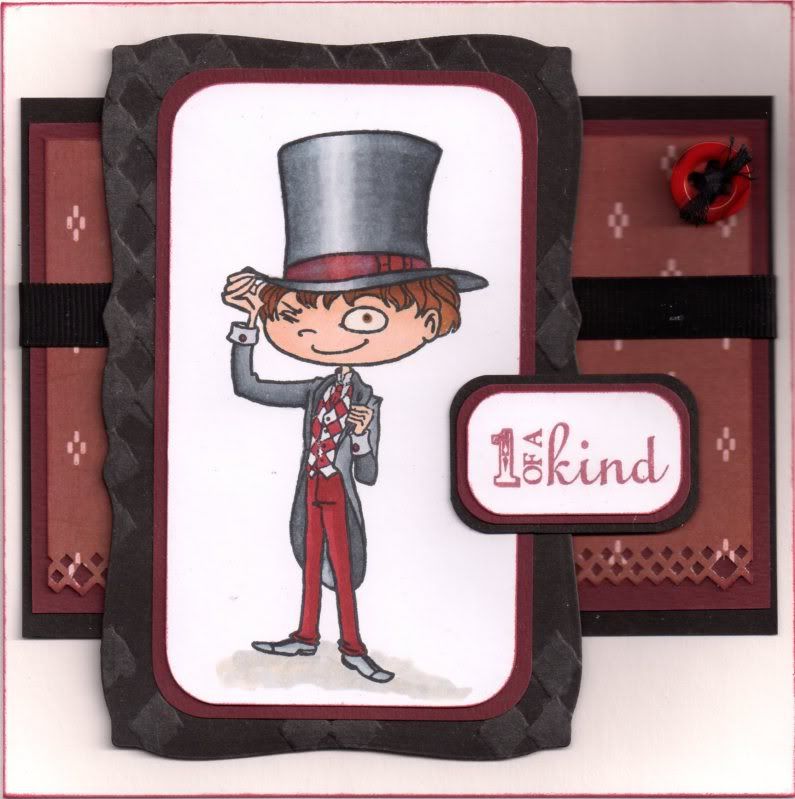
I fell in love with this image the first time I saw it and managed to get hold of it a few months ago. I decided to use the lovely Basic Grey Wisteria papers and coloured my image to match.


The Mr and Mrs Foxglove image, from Whiff of Joy, was stamped using Memento Tuxedo Black dye ink and coloured using Copic Sketch markers:
  • Foxglove 1: V12, V15, V17, B21, G00, BG11, YG11
  • Foxglove 2: V12, B21, G00, BG11, YG11
  • Hair: E13, E35, E57
  • Skin: E00, E21, E51, R20
  • Bees: V12, N1
  • Grass: BG11, YG11
I decided to interpret the image as two females as it's not obvious that it's a 'Mr & Mrs' image, at least I don't think so. The image was then matted onto light blue and purple card.

A panel of the Pond paper from the Basic Grey Wisteria paper pad was matted onto the purple card and then onto the card blank.

Using the Violet paper from the same paper pad, a panel was die cut using a Labels 3 Nestabilities die and attached behind the image panel.

The circle flourish stamp from the Fiskars Harlequin Charm stamp set was stamped using Versafine Onyx Black archival pigment ink and cut out along the outer edge of the circle. The sentiment from the Foxglove stamp was stamped in the centre of the circle using the Tuxedo Black ink and the circle was then coloured using the Copic markers:
  • Sentiment panel: V17, B21, V12
This was then attached over the Labels 3 panel and the edge of the image panel.

A bow was created from lilac organza ribbon using a bowmaker and attached in the top left corner of the card.

Highlights were then added to the image using a Papermania Snow White gel pen and to both the image and sentiment panels using a clear Sakura Stardust pen.

Here are the challenges that I am entering this card into:

Saturday 11 December 2010

Green and Glitter Wee with Christmas Tree

Here is the first of my Christmas cards that I've actually managed to scan in!!!

I love this image and decided, due to time constraints, to stamp and colour it in using just one inkpad.


The Wee With Christmas Tree image, from Whiff of Joy, was stamped using Tim Holtz Peeled Paint distress ink and watercoloured by dragging the colour from the outline and adding extra colour where needed.

The tree image was then highlighted using Glitz It Pear Green glitter glue and matted onto olive green card.

A panel of the cream glitter flourish paper from the Dovecraft Noel paper pad was adhered to the card blank. A strip of the green flourish paper from the same paper pad was then punched using the scalloped scallop border punch from EK Success and matted over the join.

The sentiment, from the Dovecraft Studio G Stylized Tree stamp set was stamped using the Peeled Paint ink and matted onto the olive green card and positioned at the bottom of the card, and the image panel over the strip of punched paper.

Here are the challenges that I'll be entering this card into:

Friday 3 December 2010

Green and Terracotta Sherwood Edwin

I fell in love with this image as soon as I saw it - and I think I probably paid over the odds for it when I saw it at the Lincoln Sincerely Yours Show back in May.


The Sherwood Edwin image from Magnolia was stamped using Memento Tuxedo Black dye ink and coloured using Copic Sketch markers:
  • Hat/Tunic: YG67, G29, G85
  • Shoes: E35, E39, E57
  • Hair: E39, E57
  • Belt: E35, E39, E57, C4
  • Feather/Arrows: E07, E35, E39, C4
  • Skin: E00, E21, E51, E13
  • Shadow: N1, N3, E43
The image panel was then matted onto a panel of olive green card from the Core'dinations Elements card pack, punched along the bottom edge using the XCut Diamonds border punch.

Three equal panels were cut from the Vintage Tee paper from the Basic Grey Boxer paper pad and matted onto the card blank. Two small ovals were die cut from the Henley paper from the same paper pad using a Nestabilities die and matted to the sides of the image panel.

The sentiment was stamped below the panels using a greeting stamp from the Elzybells Swirly Sentiments stamp set and ColorBox Burnt Sienna fluid chalk ink.

Here are the challenges that I am entering this card into:

Monday 29 November 2010

Purple, Blue and Silver Henbury Lane Bluebird

I wanted to make a card like this as soon as I saw this cute stamp. I knew I wouldn't be able to colour it as well as the illustration on the wooden block, but thought it would look nice in a sort of silhouette way. So, this is the result of my imaginings.


To begin with, the Henbury Lane Bluebird stamp from Papermania was stamped using ColorBox Midnight Blue pigment ink and heat embossed using Personal Impressions Pearl Violet embossing powder. The image was then die cut using a Labels 1 Nestabilities die.

The edges of the panel were then distressed using Tim Holtz Weathered Wood, Faded Jeans and Dusty Concord distress inks and then highlighted using a spritz of Cosmic Shimmer Silver Mica Mist spray. This doesn't really show up in the scanned image, but looks pretty good in real life.


This is the first time I've used mica sprays and I love the effect it gives.

This was then matted onto a panel of purple card, also die cut using the Nestabilities die.

A panel of the lilac distressed-effect paper from the HOTP Icy Rainbow Cardmaker's Creative pack was punched along the edge using the Martha Stewart Double Loops border punch and then distressed with the three distress inks and then highlighted with the Cosmic Shimmer spray.

I have to say that if I was to do this again, I'd recommend distressing the edges first and then punching - the distressing damaged the punched edge a little due to its fragile nature.

This distressed and punched panel was then matted onto a panel of the purple card and adhered to the left of the card blank.

The image panel was then matted over the patterned paper to the right of the card.

A white Prima paper flower was distressed with the Dusty Concord ink and the Cosmic Shimmer spray. A large purple Papermania brad was added through the centre and the flower was attached over the bottom left corner of the image panel.

Here are the blog challenges that I am entering this card into:

Friday 26 November 2010

Blue and Brown Timepiece Tag

This is a something a little bit different from me - stamping, embossing and distressing. It's the first time I've used sequin waste as a stencil!!

A blue luggage tag was distressed using a combination of Antique Linen, Frayed Burlap and Walnut Stain Tim Holtz distress inks. The Antique Linen and Walnut Stain inks were used to colour through a piece of sequin waste and then the tag was overstamped with the Pocket Watch stamp from the Paper Artsy Clocks 3 stamp set with the Antique Linen ink.


A strip of the Oxford paper from the Basic Grey Boxer paper pad was colour distressed with the three brown Tim Holtz inks and the edges curled. This was matted across the tag and overstamped with the Pocket Watch stamp and the Time Piece Collage stamp, also from the Clocks 3 stamp set, and gold embossed.

The 'To Live Is Startling...' sentiment, also from the Clocks 3 stamp set, was stamped onto the Commando paper from the same paper pad and gold embossed. This was then overstamped with the Pocket Watch image using the Walnut Stain ink. The image was then torn out and the edges distressed with the brown inks. A large gold eyelet was set in the top of the tag and threaded with string, which was coloured with the Walnut Stain ink.

A larger panel of the Commando paper was distressed with the Antique Linen and Walnut Stain inks and the Pocket Watch image was stamped over it with the Antique Linen ink. This was also used to colour through the sequin waste.

Another strip of the Oxford paper was distressed and matted across the stamped panel. This was matted onto blue card and gold square brads from Dovecraft were added in the corners.

Here are the blog challenges I'm entering with this card:

Monday 22 November 2010

Lilac and Green Picnic Tilda

Here is another of my older cards that I haven't got arund to blogging up until now. I used the lovely Lily Kate papers from Basic Grey and an older Tilda stamp from Magnolia.


The Picnic Tilda image, from Magnolia, was stamped using Memento Tuxedo Black dye ink and coloured using Copic Sketch markers.
  • Hair: Y00, YR02, E21, E35
  • Skin: E00, E02, E21, R20
  • Jumper: BV00, BV31
  • Dungarees: B41, B93
  • Patches: G12, YG11, BV31
  • Shoes: YG11, G12, N3
  • Wings: BV31, C0
  • Shadow: BV00, N3
Highlights were added to Tilda's cheek using a Papermania Snow White gel pen.

The image was cut out using a standard square Nestabilities die and matted onto a scalloped square cut from lilac card and distressed with Tim Holtz Milled Lavender distress ink.

A panel of Mia paper from the Basic Grey Lily Kate paper pad was matted onto the lilac card. A strip of the Rain paper, from the same paper pad, was punched along both edges using the Scallop Dot border punch, from Martha Stewart, and a length of lilac organza ribbon was tied around this and matted across the Mia panel.

The 'Birthday Wishes' circle sentiment from the Hero Arts Birthday Messages stamp set was stamped onto white card using the Versafine Imperial Purple archival pigment ink and cut out using a circle Nestabilities die. This was adhered to the centre of a lilac Papermania silk flower and a lilac card candy from Craftwork Cards was added to the centre and attached over the corner of the Tilda image panel.

Lilac Glitz It glitter glue was then added to Tilda's wings, around the circle sentiment and to the card candy.

Here are the blog challenges that I am entering this card into:

Friday 19 November 2010

Yellow and Orange Anniversary Heart Tag

This card was based on a design in Creativity magazine (Issue 19) and uses the Papermania Sunshine Capsule Collection.

The card blank was cut into a tag shape. A circle of the orange lace paper from the Papermania Sunshine Capsule Collection paper pad was added over the edge of a tag shaped panel of the orange and yellow floral paisley paper and the excess trimmed away. A heart shape was cut from the yellow and orange medallion paper and attached over the two papers.

A length of the orange polka dot satin ribbon and some gold border peel-offs were added across the panel and three yellow faux gems were added to the ribbon.

A hole was punched at the top and an orange eyelet set and threaded with the orange ribbon. An orange paper flower was added over the edge of the heart and a yellow faux gem was added in the centre.

The letter panels were created by cutting rectangles from yellow linen card and stamped using the Studio G Hampton Art mini alphabet stamp set with the Versafine Vintage Sepia archival pigment ink and a line drawn around the edge with a fine liner. The letter panels were then added to the bottom of the tag, some flat and some 3D'd.

I Made Top 3 At 2 Sisters Blog Challenge

My Pink and Cream How Sweet You Are gatefold card has made Top 3 at the 2 Sisters blog challenge .


I made Top 3 in their Birthday Bash Challenge.


You can see my original post for this card here.

Wednesday 10 November 2010

Another New Background

I've been forced into putting a new background on my blog as the last one disappeared and made my blog illegible!!!

This new one came with a matching header,  but I had to play around with the HTML code to make it all fit and make it a 3-column layout!

You can see where I got my blog background from here.

Monday 8 November 2010

Pink and Cream How Sweet You Are Gatefold

Here is a card made using my much-neglected K&Co papers. I've hardly used them since I got my Basic Grey papers, but decided these went well with this image.


The How Sweet You Are image, from Sarah Kay/Stampavie, was stamped using Versafine Onyx Black archival pigment ink and coloured with Copic Sketch markers:
  •  Hair: E35, E39, E57
  • Skin: E00, E21, E51, R20
  • Hat: E43, E31
  • Top/Hat Band: G12, BV31, R20
  • Dungarees: B21, B24, B93
  • Patches: R20, BV31
  • Duckling: Y00, Y08, Y17, YR02
  • Grass: YG17, G12, G14
 The corners of the image panel were rounded using the large XCut corner rounder punch and matted onto a panel of pink paper and a panel of cream card, the corners of which were punched with the Martha Stewart Eyelet Lace corner punch.

A square gatefold card was created from cream card and panels of the fritillary paper from the K&Co Somerset paper pad were punched with the Eyelet Lace corner punch and matted onto the pink paper. Strips of the harlequin paper from the same paper pad were matted onto the pink paper and adhered across the panels.

The image panel was attached to the left gate of the card. The sentiment circle, from the HOTP Sentiments stamp set, was stamped onto white card using ColorBox Old Rose pigment ink and heat embossed with clear powder. The sentiment was die cut with a circle die and matted onto a circle of pink paper and a big scalloped circle cut from cream card, all die cut with Nestabilities.

A cream Prima paper flower was colour tinted with Tim Holtz Spun Sugar distress ink. The small button image from the Papermania Clare Curd Doodles stamp set was stamped onto the pink paper using the Old Rose ink, clear embossed and cut out. Cream embroidery thread was knotted through the pierced holes and the image was then matted onto a cream circle and added in the centre of the flower. The flower was then added to the corner of the image panel.

Here are the challenges I am entering this card into:

Friday 5 November 2010

Lavender, Blue and Silver Butterfly Frame

Here is another of my butterfly cards using the free Kate Knight papers that came with the Cardmaking and Papercraft Magazine a couple of months ago.


A circle was die cut from white card using a Nesties die and the butterfly image from the Penny Black Enjoy Life stamp set was stamped using Versacolor Black pigment ink and heat embossed with PSX silver embossing powder.

The butterfly image was coloured using Copic sketch markers:
  • Butterfly: BV00, BV04, B41
 and highlighted with Tim Holtz Rock Candy Distress Stickles.

The edge of the circle was lightly coloured with Tim Holtz Dusty Concord distress ink and silver embossed.

The Fleur de Lys circle frame stamp, from the Papermania Hampstead Icons and Sentiments stamp set, was stamped and silver heat embossed onto cornflower blue paper and die cut using a circle Nesties die. This was matted onto a die cut circle from a Lakeland set of die cut sheets and a Big Scalloped circle die cut from silver mirror card.

A panel of the blue patterned paper, from the pad of free Kate Knight designed papers, was distressed around the edges with the Dusty Concord ink and a length of lilac organza ribbon was tied around the centre.

This was then matted onto the blue paper and the silver mirror card and then onto the card blank.

Clear Dew Drops from Patti's Pretties were then added in each of the corners of the patterned paper.

Here are the challenges I am entering this card into:

Monday 1 November 2010

Blue and Gold Peacock Feathers

Here is another of my masculine cards - this time using the very difficult-to-use Laurence Llewellyn-Bowen Venaissance stamps and papers.

I think if I was to make this again, I might stamp the feathers onto cream card and distress that to make it stand out from the backing papers a little more.


The Peacock Feather image, from the LLB Venaissance clear stamp set, was stamped using Ink It Up! Bright Blue pigment ink and heat embossed using Heat It Up! Gold embossing powder. The Frieze Border image, from the same stamp set, was then also heat embossed around the edge of the panel to frame the image.

Tim Holtz Brushed Corduroy distress ink was then used to colour distress the edges of the image panel before matting it onto gold mirror card.

The sentiment, from the Hero Arts Anytime Messages stamp set, was also gold heat embossed onto a panel of the blue card and the Frieze Border was partially stamped around the edges. As before, the edges were distressed with the Brushed Corduroy ink.

A panel of the blue peacock feather paper, from the LLB Venaissance paper pack was created by joining two pieces of paper with a strip of Anita's cream and gold wavy metallic self-adhesive ribbon and distressed with the Brushed Corduroy ink. This was then matted onto the gold mirror card before being adhered to the card blank.

Here are the challenges I'll be entering this card into:

Thursday 28 October 2010

Pink, Brown and Orange Love Notes

I love this image and can't believe this is the first time I've used it!! Naughty me!! I've had it for a while now too!


The Love Notes image, from Pollycraft, was stamped using Versafine Onyx Black archival pigment ink and coloured with Copic sketch markers:
  • Hair: E13, E35, E39
  • Skin: E00, E21, E51, R20
  • Eyes: YG07, E40
  • Dress: YR02, RV06
  • Socks/Wings: YR02
  • Shoes: E35, E39, YR02
  • Flowers/Grass: YG07, G05, YR02, RV06
  • Sign: YR02, E11, E00
The sentiment was then added using the sentiment stamp from the same stamp set using Versafine Vintage Sepia archival pigment ink.

The image was die cut using an oval Nestabilities die and matted onto a big scalloped oval die cut from pink card. A panel of the pink, brown and orange multi-stripe paper, from the DCWV Glitter Mat Stack, was matted onto orange card and onto the card blank.

A strip of the pink, brown and orange retro squares paper, from the same paper pad, was also matted onto the orange card and adhered across the larger mat.

Pink and orange Sakura Stardust pens were then used to highlight the wings, hearts, flowers and sentiment. The Papermania Snow White gel pen was used to highlight her eyes, cheeks and detail on her dress.

The edge of the card blank was punched using the XCut scalloped border punch and coloured with the Copic markers. Pink faux gems were added in each of the scallops and in each of the hearts.

The inside of the card was also decorated with a strip of the multi-stripe paper adhered to a strip of the orange card. The edge of the orange card was punched with the scallop border punch and added on the inside of the card behind the scallop border.

Here are the challenges that I am entering this card into:

Tuesday 26 October 2010

Pink, Black and White Wildflowers

This card was inspired by one that I saw in an issue of Creativity magazine. Just discovered it was Issue 19!
I decided to use one of the stamps from the Crafty Individuals Wildflowers stamp set.

The Wildflower stamp was inked up using the Versafine Spanish Moss archival pigment ink and Whispers Port Wine permanent dye ink and stamped onto the Greenhouse paper from the Basic Grey Wisteria paper pad. The flowers were then coloured using the Carmine Impress reinker.

The individual words from the 'Just For You' stamp from the Clear Choice! Birthday Parcels and Greetings stamp set were inked up with the Port Wine ink and stamped onto the separate panels.

A length of the Anita's pink two-tone self-adhesive ribbon was adhered to a panel of the black and white polka dot paper from the Papermania Clare Curd 'The Big One' paper pad, and a knot attached to the right.

The image panels were attached overlapping each other and at angles and clear faux gems were added to the third panel.

Here are the challenges that I will be entering this card into:

Sunday 24 October 2010

Red and Cream Vintage Lady

Not the greatest of pictures for this one I'm afraid - it's a bit too unevenly 3D'd for the scanner!!!


The Vintage Lady image, from the Vintage Postage Ladies stamp by Crafty Individuals, was stamped onto cream card using Versafine Crimson Red archival pigment ink was cut out using the Cuttlebug Square stamp die. This was then matted onto a beige square cut from Core'dinations card and a scalloped red square, both cut using the Nestabilities dies.

A panel of the red card was cut and the bottom edge punched using the Martha Stewart Flower Bed deep edge punch. The edges of the panel were heat embossed using Ink It Up! gold pigment ink and Heat It Up! gold embossing powder.

A panel of the beige and red rose paper from the K&Co Classic K Bailey paper pad was matted onto the red panel and a length of the cream and gold self-adhesive Anita's ribbon was added along the bottom of the patterned paper. The stamped image was added in the top left corner and three cream pearl beads were attached to the top right corner.

The sentiment, from the Papermania Chatsworth Frames and Messages stamp set, was stamped onto the cream card using the Crimson Red ink and matted onto the beige and red cardstock. A pearl bead was stitched in the corner of the sentiment panel and adhered to the card over the ribbon.

Here are  the challenges that I'll be entering this card into:

Thursday 21 October 2010

Blue and Brown Jungle Edwin

Another card using the great Jungle Edwin image, once again coloured using Copic Sketch markers.


The Jungle Edwin image, from Magnolia, was stamped using Memento Tuxedo Black dye ink and coloured using Copic Sketch markers:
  • Hat: E35, E41, E43
  • Hair/Stick: E35, E57
  • Skin: E00, E21, E51, R20
  • Shirt/Socks: BG11, BG32, B00
  • Belt: E35, E43, Y17
  • Boots: E35, E41, Y17
  • Shorts: E41, E43, BG11, B00
  • Knife: E35, E57, C0, C2
The image was then cut out and matted onto a panel of white card coloured with Tim Holtz Weathered Wood distress ink, and a panel die cut using a Labels 8 Nestabilities die from Papermania Gold textured cardstock.

A strip of Brown Brushstroke 'Our Vacation' paper from the K&Co Tim Coffey Vacation paper pad was matted onto a strip of the gold card and adhered across a panel of the Vacation Images paper from the same paper pad.

The image panel was added over the strip and three gold card candy from Craftwork Cards, coloured with the Tim Holtz Frayed Burlap, Scattered Straw and Brushed Corduroy distress inks and highlighted with Tim Holtz Vintage Photo Distress Stickles.

The sentiment, from the Fiskars Make A Wish stamp set, was stamped onto white card using Versafine Onyx Black archival pigment ink. The corners were rounded using the small Avec corner rounder punch and matted onto the gold card.


The inside of the card was also decorated. A panel of the brown compass points paper, also from the Vacation paper pad, was matted onto the gold card. A panel was cut from white writing paper and the sentiment stamped in the centre using stamps from the Elzybells Swirly Sentiments stamp set with the Onyx Black ink. The edges were distressed using the Brushed Corduroy ink and matted onto a panel die cut from the gold card using a Labels 8 Nestabilities die.

Here are the challenges I am entering this card into:

Tuesday 19 October 2010

Lilac and Purple Tilda with Rolling Pin

Here is a card that I actually watercoloured - a novelty for me of late because I love using my Copics!!


The Tilda with Rolling Pin image, kindly donated by Alex K, was watercoloured using the Tim Holtz Distress inks.
  • Dress: Milled Lavender, Dusty Concord, Black Soot
  • Socks: Milled Lavender
  • Hair Ribbons: Dusty Concord
  • Hair/Shoes/Rolling Pin: Antique Linen, Frayed Burlap, Black Soot
  • Skin: Tattered Rose, Worn Lipstick
Highlights were added to the image using the Papermania Snow White gel pen.

The image was cut out using the Mega Curved Rectangles die from Nestabilities and colour tinted around the edges with the Milled Lavender and Dusty Concord inks. A larger panel was cut from the mauve card and a strip of the lilac blossom glitter paper from the Papermania Henbury Lane paper pack was adhered across it.

The Tilda image was then adhered to the shaped panel and a Prima paper flower was attached using a mauve Papermania brad to the top corner.

The corners of the card blank were punched with the XCut large corner rounder punch and the edges lightly colour tinted with the Dusty Concord ink.

Another panel of the lilac blossom glitter paper was cut and the corners rounded and matted onto a panel of the mauve card. A strip of the lilac and white flourish paper, also from the Henbury Lane paper pack, was matted onto a strip of the mauve card and a strip of the Anita's stripy lilac grosgrain ribbon was wrapped around the panel and the panel attached across the centre of the larger panel.

The sentiment tag was created by die cutting a Cuttlebug circle tag and the sentiment, from the Hero Arts Birthday Messages stamp set, was stamped in the centre of it with Versafine Imperial Purple archival pigment ink. The edges were then coloured tinted with the Milled Lavender and Dusty Concord inks and a short length of the lilac ribbon was threaded through the hole at the top.

The tag was then attached over the bottom corner of the Tilda image panel.

Highlights were then added to the image, flower, brad and sentiment tag using Craft Planet Lavender glitter glue.

Here are the blog challenges that I am entering this card into:

Monday 18 October 2010

Blue and Yellow Enjoy The Journey Bluebirds

Here is my 500th card design!!! I can't believe I've made 500 different designs of cards. No idea how many actual cards I've made as sometimes I've made multiples of the same design (I've made two of this one!).

It's a little bit different to my normal style of cards but this is a lovely stamp and thought it was appropriate for the recipient!!


The Bluebirds image, from the Penny Black Enjoy Life stamp set, was stamped using Versafine Onyx Black archival pigment ink and coloured using the Copic Sketch markers:
  • Birds: B12, B18, B24, Y00, Y08, YR02
  • Branch: E35
  • Leaves: YG17, YG67
  • Berries: E07, R29
  • Flowers: R20, YR02, Y08
  • Edges: B18, B24
The image was then matted onto yellow paper and blue card.

A strip of the blue polka dot paper from the Making Memories Fresh Anthology Sydney paper pad was matted onto the blue card and across a panel of the yellow and green vine stripe paper from the K&Co Tim Coffey Daffodil paper pad, also matted onto the blue card. I haven't used these papers for ages, so decided it was time to pull them out again. I'm sure they were feeling just a little bit neglected!!!

The image panel was added over the polka dot stripe panel and Prima paper flowers, from the Prima Botanical Mix, were added over the corner of the image panel and a soft white card candy, from Craftwork Cards, added in the centre of the blue flower and smaller circles were punched from blue card candy for the centres of the smaller cream flowers.

The sentiment, from the Making Memories Express It stamp set, was stamped using Versafine Majestic Blue archival pigment ink and matted onto the yellow paper and blue card and added in the bottom right corner.

Here are the challenges I shall be entering this card into:

Saturday 16 October 2010

Pink, Green and Lilac House Mouse Balancing Candle Quarters

Here is my first House Mouse card! I've always loved these images but haven't been able to justify the cost. Thankfully, the lovely Joanna Sheen has now released some of these images as unmounted stamps, making them a lot more affordable. Hopefully a few more of these lovely images will be made available in this format.


The House Mouse image, from the Birthdays Balloon stamp set from Joanna Sheen, was stamped using Memento Tuxedo Black dye ink and coloured using Copic sketch markers:
  • Mouse Fur: E31, E43
  • Mouse Face/Ear/Tail: R20, E40
  • Eye: C0
  • Candle: YG07, YG11
  • Flame: YR02, Y08
The image was die cut using an oval Nestabilities die and matted onto a green oval and lilac big scalloped oval die cut from pearlescent paper.

Squares of papers from the K&Co Sparkly Sweet paper pad were matted onto Anita's lilac pearlescent paper and a length of Anita's pink self-adhesive satin ribbon adhered over the join.

The sentiment, from the HOTP Sentiments stamp set, was stamped using ColorBox Fresh Green pigment ink and die cut using a circle Nestabilities die, then matted onto a larger green circle and scalloped lilac circle.

The image panel was matted to the left of the panels and the sentiment in the bottom right corner.

Here are the challenges that I am entering this card into:

Friday 15 October 2010

I Made Top 3 At The Sisterhood of Crafters

Well, everyone who took part in the last challenge made Top 3 as they found it too hard to choose.

So, my Duck Egg Blue and Cream Fly Free Sugar Nellie card made Top 3 at The Sisterhood of Crafters blog challenge.


It was chosen as Top 3 in their colur challenge of Blue, Brown and Ivory.


You can see my original post for this card here.

Thursday 14 October 2010

An Historical Moment

I didn't think I could let this moment pass without saying something. Over the past 25 hours I've watched almost all of the coverage of the miraculous rescue of the 33 trapped miners from the San Jose mine in Chile; the rescue of 33 miners who have spent 69 days underground, and the recovery of 6 rescue workers.

It has been truly amazing to watch, from the tense first run of the rescue cage with the first rescue worker to the rescue of the 33rd miner and the recovery of the last rescuer.

Just felt it was too important an event to not mention it. Hopefully they can all return to 'normal' life swiftly and safely.

Tuesday 12 October 2010

Burgundy and Black Chester

Here is the card that I made for my hubby's uncle. I love this image and I can't believe it's taken me this long to use it. I'm also rather pleased with the colouring, especially his hat!!!


The Chester image, from Kraftin' Kimmie, was stamped using Memento Tuxedo Black dye ink and coloured using Copic sketch markers:
  • Skin: E00, E21, E51
  • Eye: E39, E40
  • Hair: E35, E39, E57
  • Hat/Jacket/Shoes: C0, C2, C4, C6, C8
  • Hat Band: R20, R59, E07, C2
  • Shirt: C2
  • Waistcoat: R59, C0
  • Tie/Cufflinks/Trousers: R59
  • Shadow: C2, E40
The corners of the image were rounded using the large XCut corner rounder punch, and then matted onto a panel of burgundy card.

A panel of black card was die cut using the Mega Curved Rectangles Nestabilities die and embossed using the Cuttlebug Diamonds in the Rough embossing folder. The raised areas of the panel were coloured with a Versamark pen and silver shimmer chalks dabbed over the top from the Papermania Earth Tones set of shimmer chalks.

A panel of the burgundy geometric paper from the Papermania Red Hot Capsule Collection paper pad was punched using the XCut Diamonds border punch, then matted onto the burgundy and black card. A length of black grosgrain ribbon was then attached across the panel.

Black embroidery thread was knotted through a red button and added in the top right corner of the patterned paper panel.

The sentiment, from the Hero Arts Anytime Messages stamp set, was stamped using Versafine Crimson red archival pigment ink and the corners rounded using the small Avec corner rounder punch. This was matted onto the burgundy and black card and attached over the edge of the image panel.

Here are the challenges that I will be entering this card into:
Blog Widget by LinkWithin